Character Movement
Unbound ships with a pair of logic blocks and a rigged humanoid puppet to make creating a playable character easy.
Overview
This article covers how to add the character puppet rig and connect it to the characterController and characterPuppet so that you, and the character, can be off and running in just a few clicks. This will not be an exhaustive guide to every property of these logic blocks but it'll more than get you started 
Related Information
If you're unfamiliar with visual scripting, consider reading Unbound's Logic Block Basics before continuing.
If you'd like to follow along or see the finished product you can download the file here.
Logic Blocks Used in This Example
- characterPuppet for setting up poses and character defaults
- characterController for keyboard input and character movement
Adding the Character Puppet
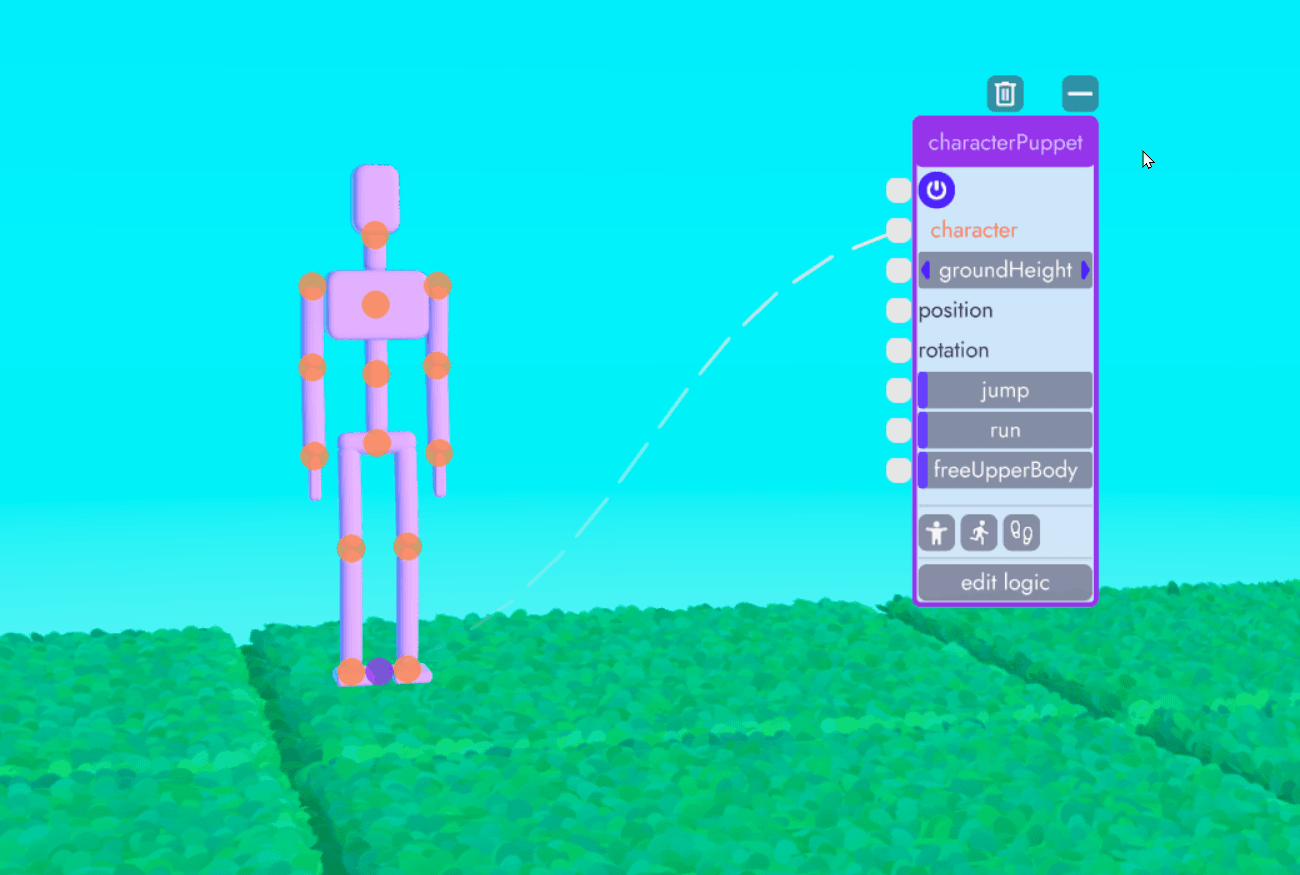
Start by opening the Logic Library (1) and then drag the characterPuppet logic block (2) into the scene. This will add a puppet skeleton, the characterPuppet logic block, and the characterController logic block! If the puppet is floating in the air don't worry, we'll fix that in a second.
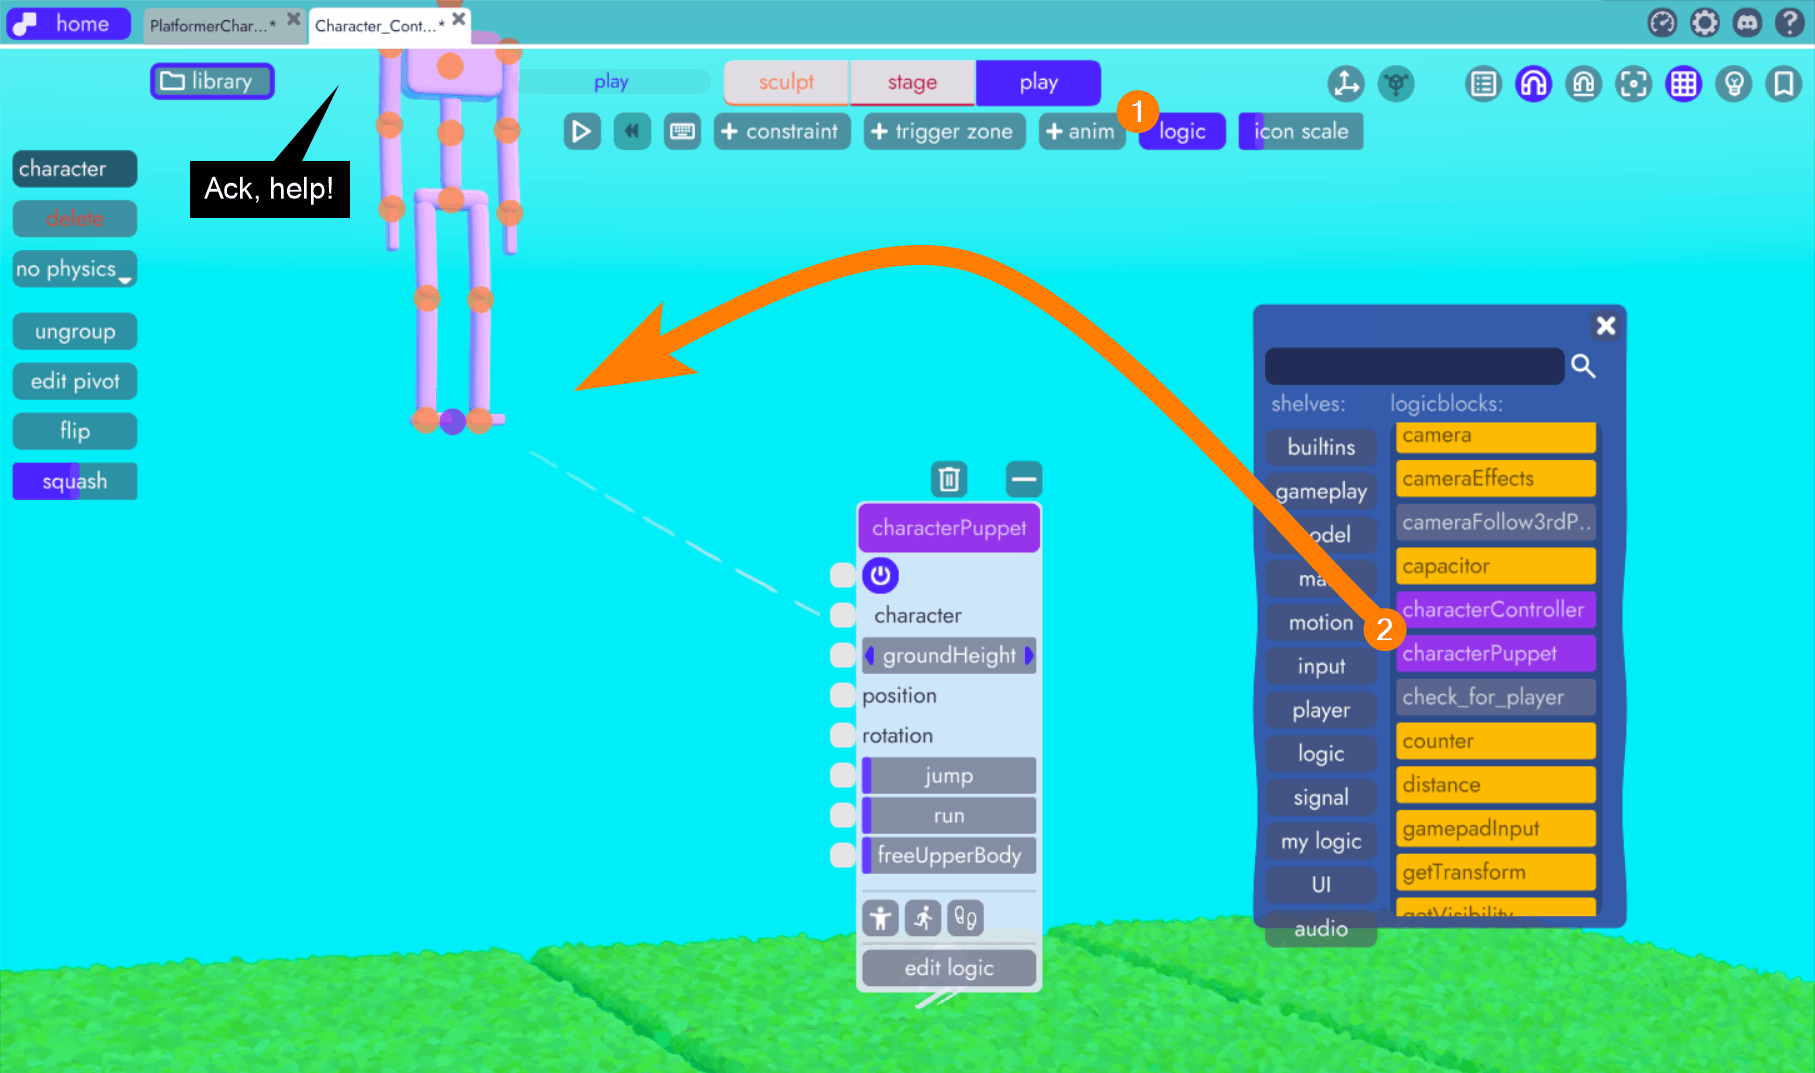
The characterPuppet logic block gives you the ability to control the puppet with other logic blocks (or code) as well as within the editor. For example, this logic block allows you to snap the puppet into different poses (e.g. rest, jump, T, etc) so that you can adjust those animations to fit your game or, in the case of the T-pose, make it easier to re-skin the puppet with your design.
First, let's bring the puppet back down to earth. Click the purple dot between his feet. Now that the transform gizmo is visible, grab the green Y-Axis handle and drag him closer to the ground. It doesn't have to be perfect, we'll set the exact ground height shortly.
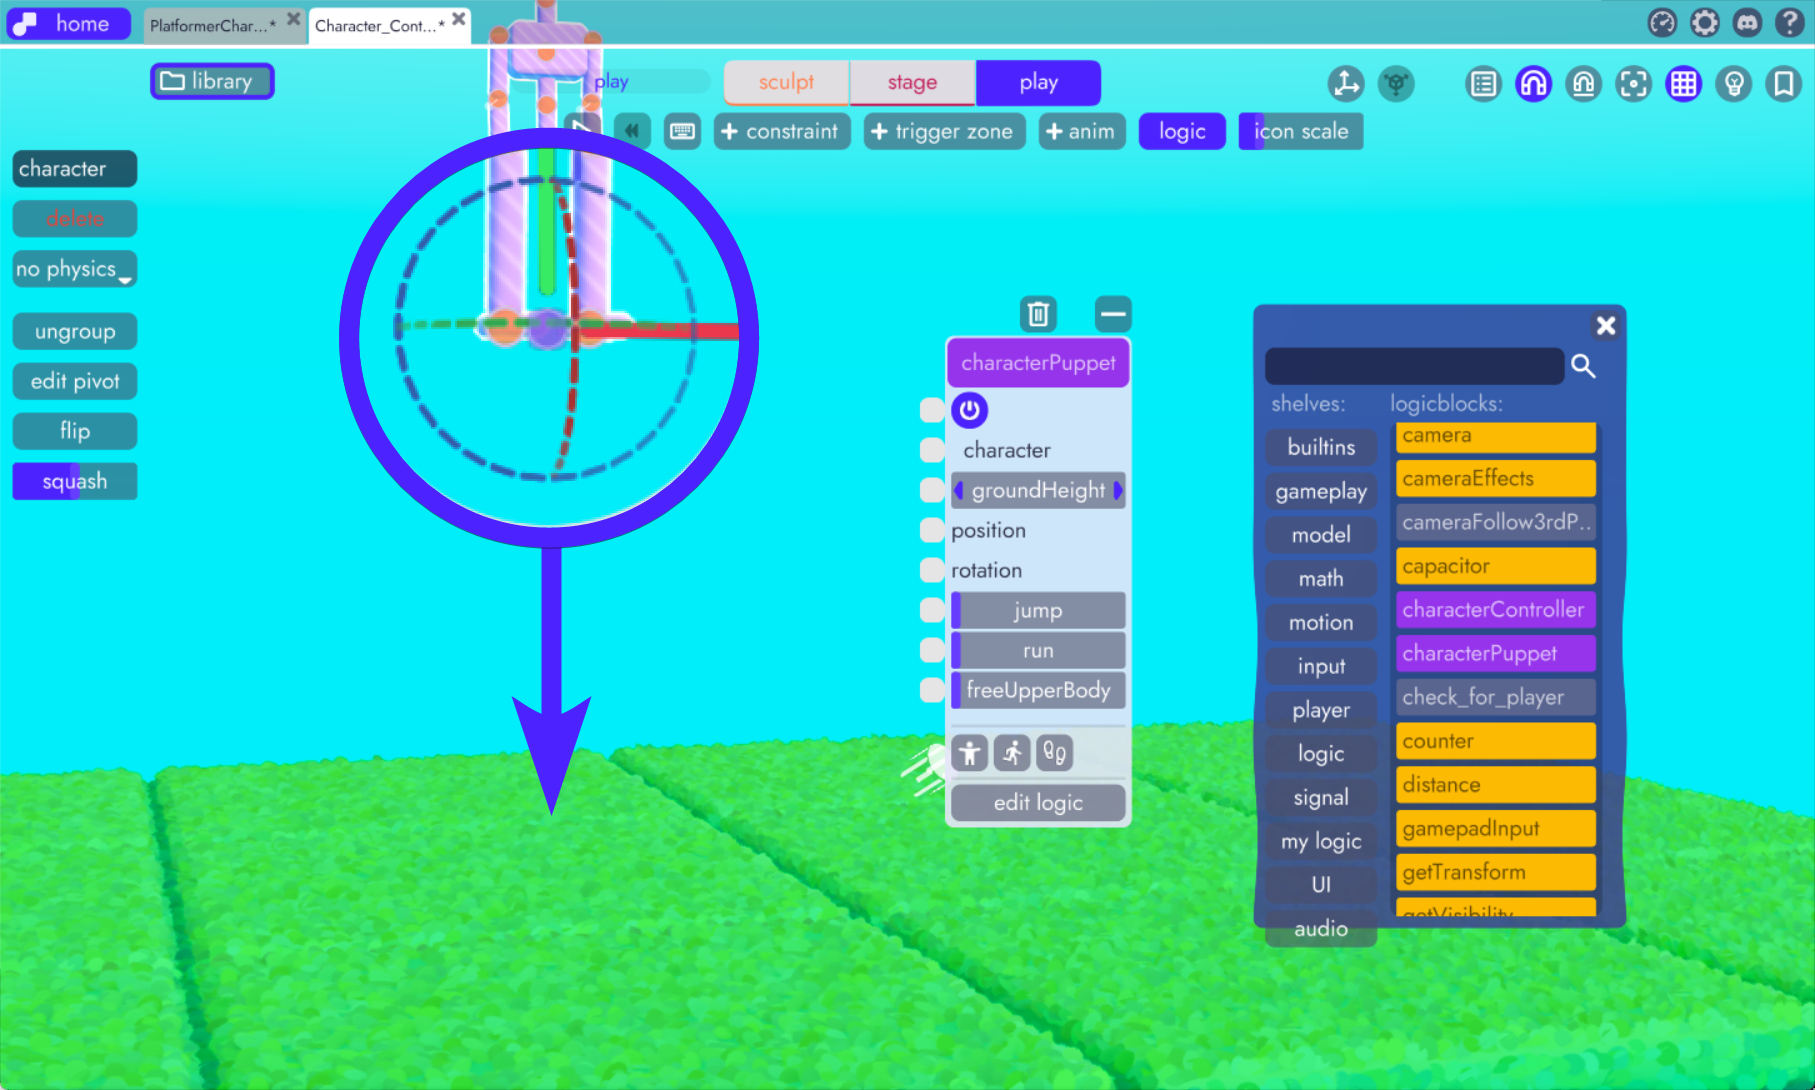
The purple dot is the parent of the character puppet (it's a Joint) and you may notice that it's connected to the character input on the characterPuppet logic block. This is what allows the logic block to "talk" to the puppet.
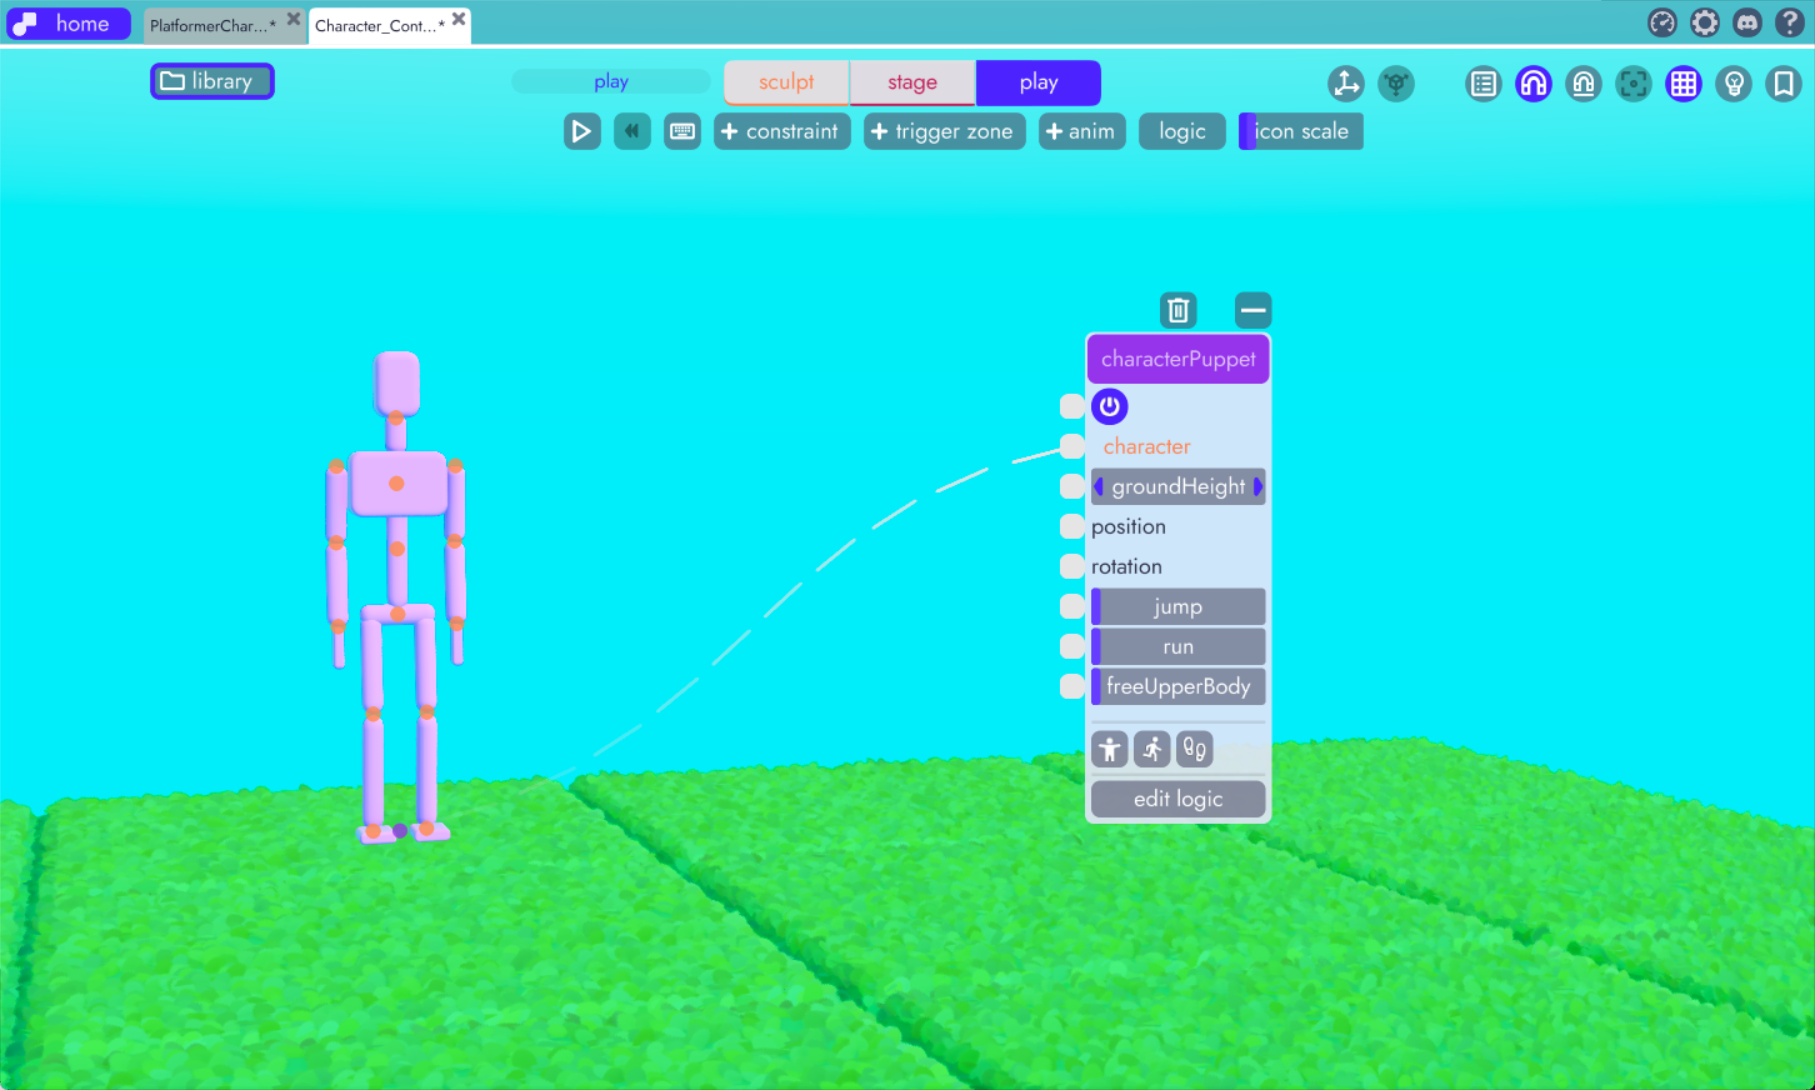
When you're done, it should look something like this.
Warning
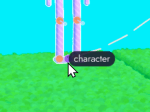 If you accidentally disconnected the puppet from the block, don't worry! Just click the dot next to character in the logic block and drag the connection back to the purple dot between his feet. The tooltips show the name of the joint or model you're about to connect to - you're looking for character.
Accessing Different Poses & Animation Properties
Clicking the icons at the bottom of the characterPuppet block will allow you to edit the poses and change the animation properties of this puppet.
Save Your Project!
Before we continue, now would be a great time to save your project. Click the Library icon near the upper left then click Save. If you change the name in the field above the save button it create and save a copy of this scene in your project (this is unbound's equivalent to Save As)
Example: Edit Jump Pose
If you click the icon of the running person at the bottom of the characterPuppet logic block it will allow you to select different poses for editing. Click on edit jump pose and then manipulate the joints into the position you'd like to use for your jump.
That's it! Now when your character jumps, it'll take this pose instead of the default. Now let's set up the characterController so we can test this out.
The characterController
This block allows you to define the character's properties, such as movement and rotation speed. It also defines some other values like gravity, jump speed, and even a tag to report collisions.
Keyboard Input
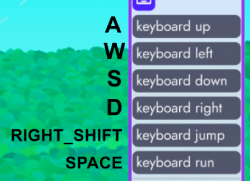 Keyboard input is built into this logic block with the following default values but you can change them to whatever you'd like by entering a different key for each action. Out of the box, WASD will move your player, Right Shift runs, and SPACE jumps.
It also captures keyboard input and translates it to values the characterPuppet uses to change the state and position of the puppet.
characterPuppet
This block is responsible for setting the position and animations on your puppet model which typically come from the connections we just made to the characterController. Aside from using it to toggle between poses so you can edit them within unbound, you likely won't do as much in-editor with this block as you might with the characterController.
Colliding with the Ground
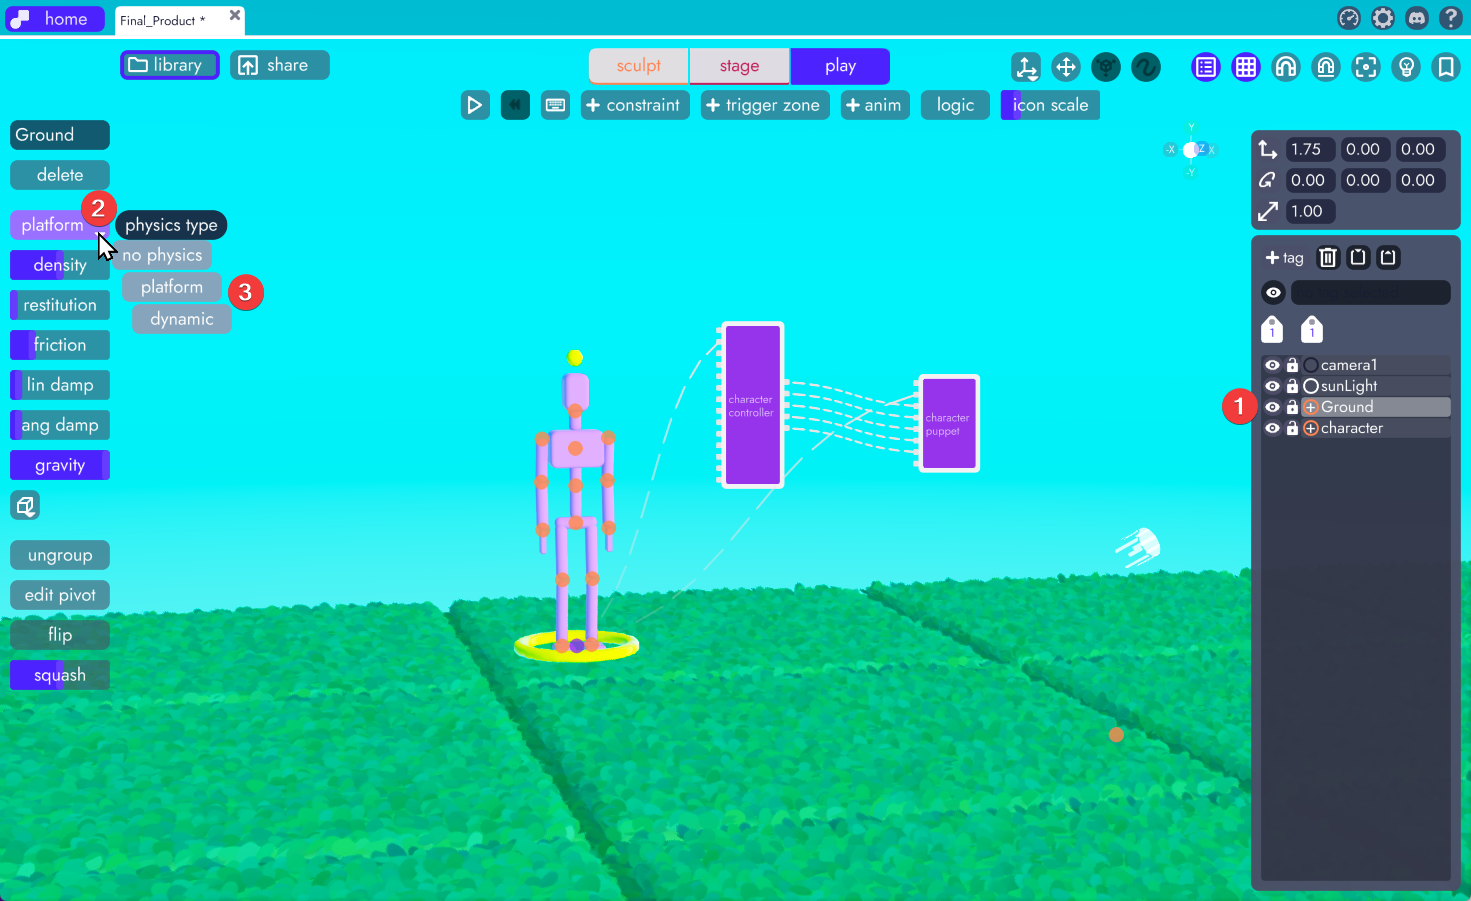
As promised, we're going to address the player falling through the ground. Since the puppet works with physics, you simply need to make the ground a platform. Select the ground models and then from the physics dropdown on the left, select "platform". This will ensure that the player knows to collide with the ground.
Note
You will need to be in either the Stage or Play tabs in order to see the physics dropdown. If your ground is made of multiple models, instead of one Ground model as shown above... simply select all those models, go to the Stage tab, and click "joint" to nest them into one container.
Make it Run!
To run the project, head over to the play tab, press play (1) and then be sure to enable keyboard input (2)

You can move around with the WASD keys. If you hold RIGHT SHIFT while moving you'll notice the puppet switches to the run animation while pressing SPACE causes it to jump (which should show the new jump pose we created)