Creating a Rollover Effect
Reacting to a mouse hover is extremely common in game development, whether it's creating basic UI effects or highlighting key elements within the game.
Overview
In this example, we’re going to use a capacitor to smoothly scale a model up or down based on whether the mouse is over that model. When a hover is detected, we’ll scale the model up and when the mouse stops hovering we’ll return it to its original scale.
Related Information
If you're unfamiliar with visual scripting, consider reading Unbound's Logic Block Basics before continuing.
If you'd like to follow along or see the finished product you can download the file here.
Logic Blocks Used in This Example
- modelClick to detect mouse interaction
- capacitor to generate a value between 0-1 that we can map to a scale
- mixer to choose our scale values
- setTransform to set the scale of our model
What We're Going to Make
Let's start by looking at the completed effect.
As you can see… When we hover the mouse over the fish it scales up uniformly to 1.5 along the X, Y, and Z axes.
Here’s what the final graph looks like. Let’s walk through the role of each logic block. The values that have been changed have been superimposed on the image for your convenience.
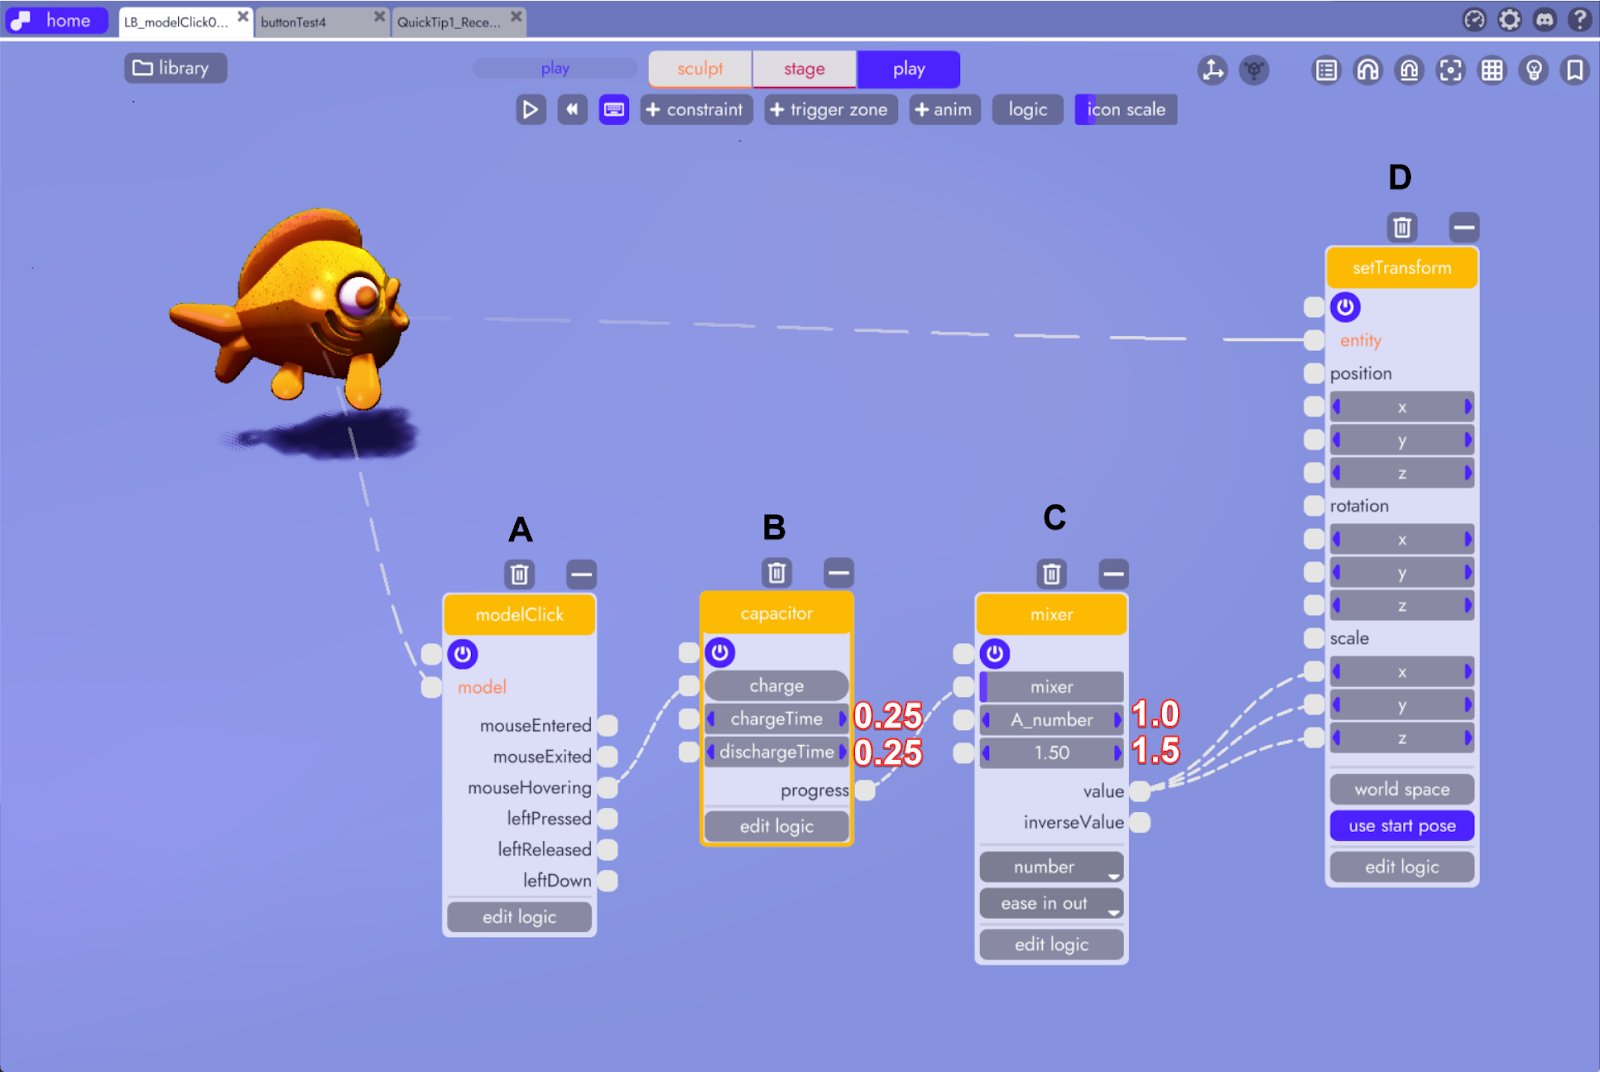
Logic Block A: modelClick
As we did in the Reacting to Model Clicks example, this is connected to the fish so that we can detect when the mouse hovers over it. When the mouse is over the fish, mouseHovering is set to true. When it’s not, mouseHovering will be false.
Logic Block B: capacitor
While charge is set to true, the capacitor will continually push progress toward 1 but never over. When false, it will fall back towards 0 but never below.
The time it takes to move toward 1 when charging (or to fall to 0 when not) is determined by the chargeTime and dischargeTime values, respectively. In this case, both have been set to 0.25 because we want this effect to happen relatively quickly. To slow these effects or have it grow or shrink at different rates you can adjust these values.
Logic Block C: mixer
The mixer allows us to map progress value from the capacitor to usable values - in this example the scales for our fish (no pun intended).
As you can see, we have A_Number set to 1.0 and B_Number set to 1.5 in the mixer block. The mixer input expects a normalized value (i.e. a number between 0 and 1, or, 0% to 100%) representing where on a number line beginning at 1.0 and ending at 1.5. Consider the example below.
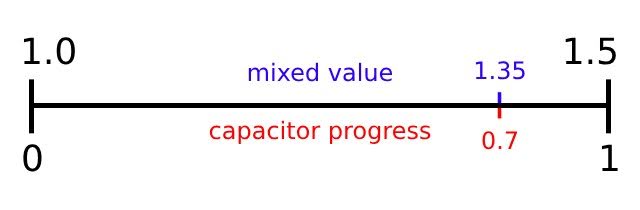
At the bottom is the capacitor’s progress output which goes from 0 to 1. We can then use the mixer to map to values ranging from 1.0 to 1.5 along that same number line. So for example, a value of 0.7 (i.e. 70% of the way from 0 to 1) maps to 1.35 on that number line.
This is how we turn the capacitor’s progress into the values between which we scale the fish.
You may also notice that we’ve selected ease in out in the mixer’s easing dropdown. This is what gives us a smooth transition between 1.0 and 1.5. You can play with these values to get different effects. The default value, linear, will give you a constant value change which in some cases is preferable. Typically in cases such as roll-overs, using an easing function makes the animation feel more fluid and lively.
Logic Block D: setTransform
Lastly, we’re feeding the value output from our mixer into the X, Y, and Z scale values of the setTransform block, which is connected back to our fish model so that it knows which transform to change.
Tip
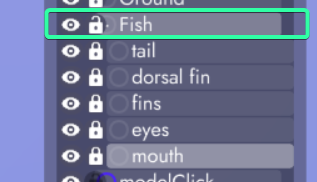 If you’re having trouble connecting a block or animation to the correct node because it has nested models that are being accidentally selected, try locking or hiding the children. With the children locked, only the parent model will be selectable and thus it will be the only model that can accept a connection to a logic block or animation.
In this example, make sure you're connecting both the model input on modelCilck and the entity input on setTransform to the fish model. Pay attention to the name of the model in the tooltip as you're making the connection.