Randomization
Overview
In the previous article (Collecting Items) we wired up trigger zones to detect when the player collected a coin. We left off by using the setVisibility node to verify that our triggers were working properly. In this example, we'll move the coin to a random location when the player collects it.
Logic Blocks Used in This Example
- randomize
- setTransform
By the end of this article you'll understand how to use the setTransform logic block to control the position of a model and how to feed it randomized values that are within your game world.
Related Information
If you're unfamiliar with visual scripting, consider reading Unbound's Logic Block Basics before continuing.
If you'd like to follow along or see the finished product you can download the file here.
Using setTransform
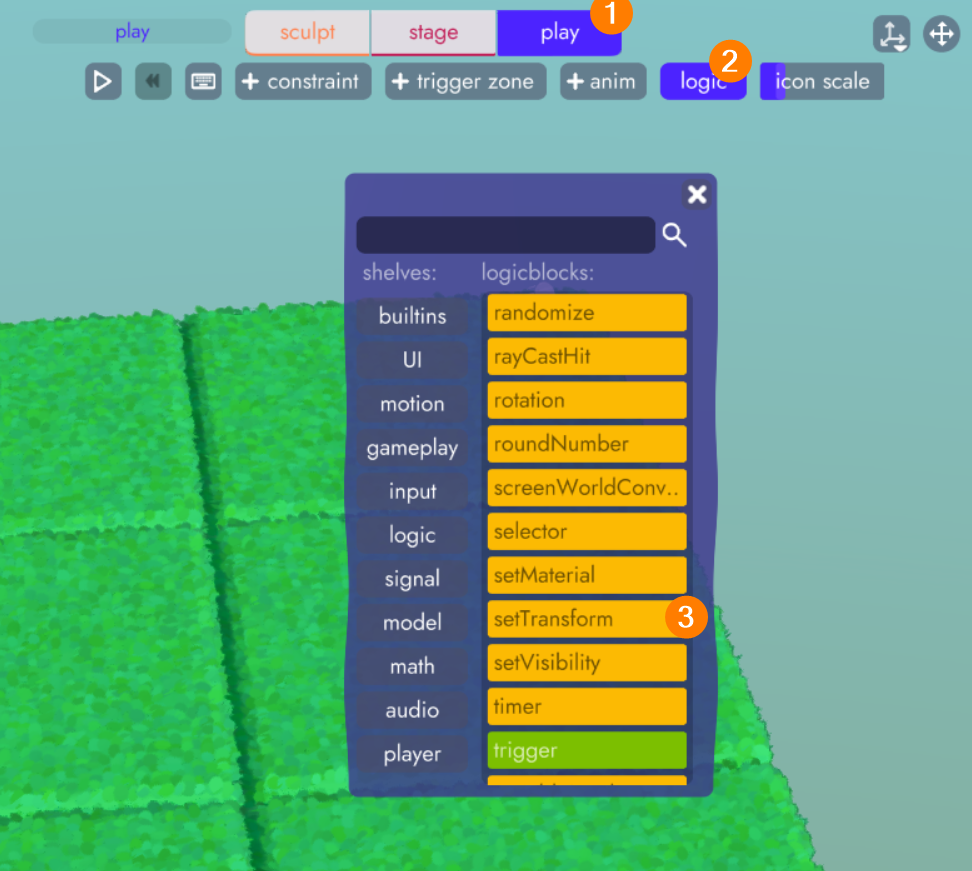
Instead of simply toggling the visibility of the coin, now we're going to move the coin around the game world after collecting it. Let's start by dragging a setTransform logic block from the Logic Library. To do this, you have to be in the Play Tab.
Not sure how to add a logic block?
Open the Play tab, click "logic", find the logic block you want and drag it into the scene.
Drag a connection between the entity input of setTransform to the coin. Remember, you may need to hide the trigger from the organizer in order to be able make this connection.
Now, just to get an idea of how setTransform works, enter a value of "3.0" in the x-position and y-position fields and run the game by pressing the play button.
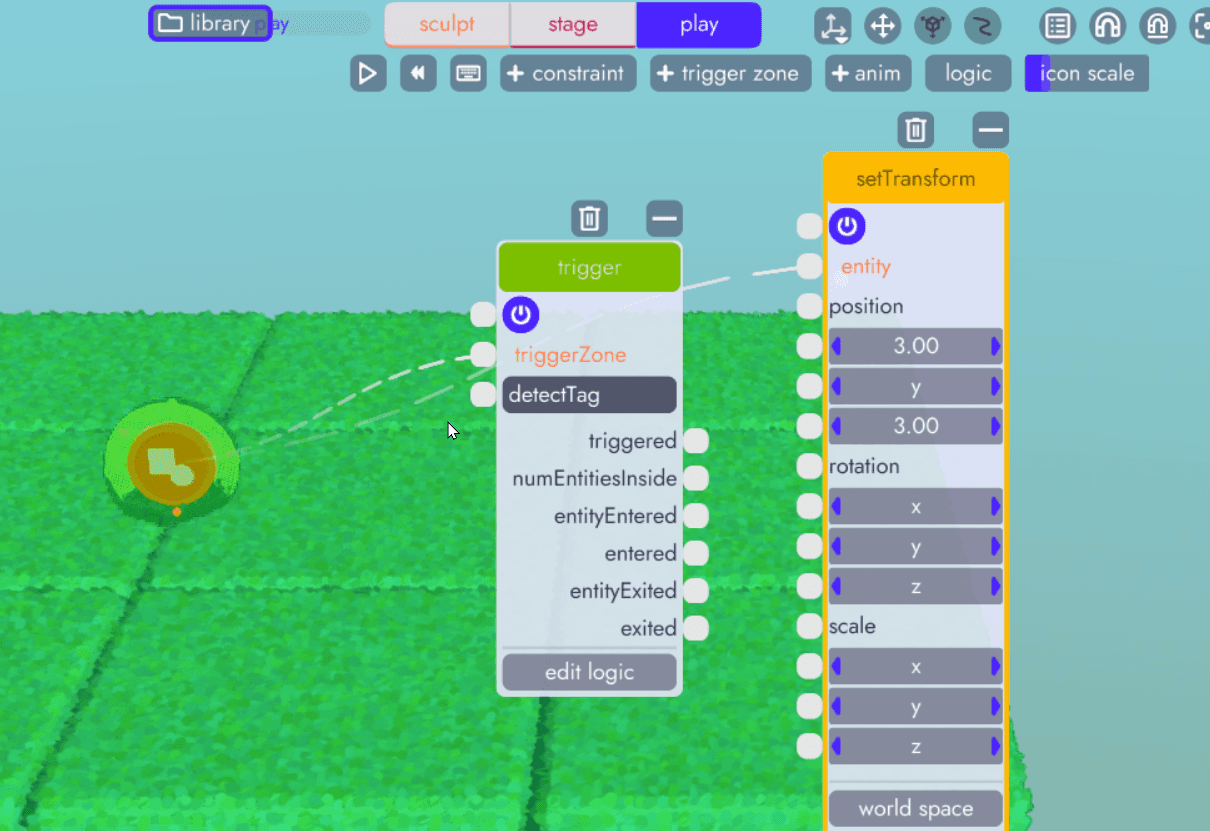
You will see the coin jump from its starting position to (3.0,0,3.0). This is because while enabled (purple power button) the setTransform logic block will set the X and Z position to 3.0. We will be using this to move the coin around the game world.
Note
You may also notice that even though we only moved the coin, the trigger zone moved too. This is because in the previous article we made the trigger zone a child of the coin. The trigger zone does not have to be a child of the coin, in fact it can be anywhere. But since we always want them together, this allows us to move them both more easily.
Randomizing the Position
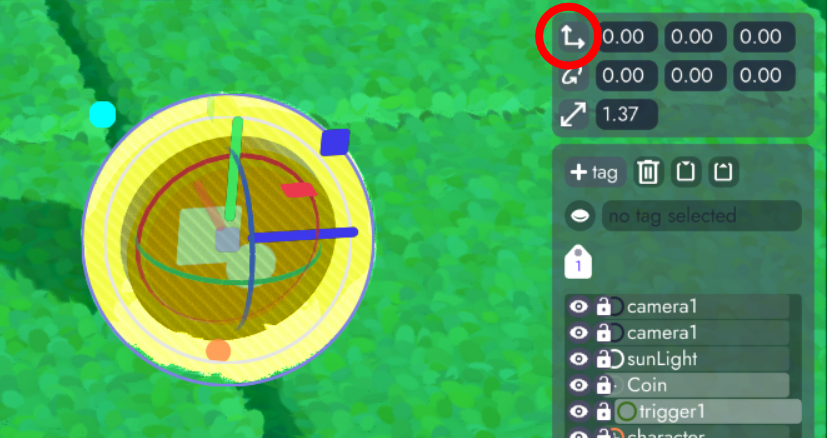
Instead of hard-coding the value like we did above, we want to be able to select random values each time we move the coin. First, let's figure out what values make sense. The simplest way to do this is to drag the coin around with the organizer open so you can determine the boundaries of the playfield. We'll be looking at the X and Z values.

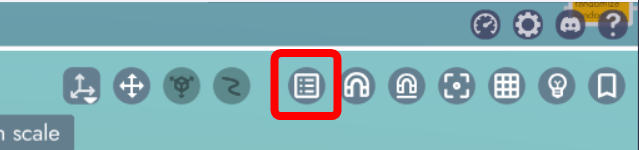
You'll need to open the organizer so you can see the values change as you move the cube around.
Don't see the organizer?
To open the organizer, click this button in the toolbar.
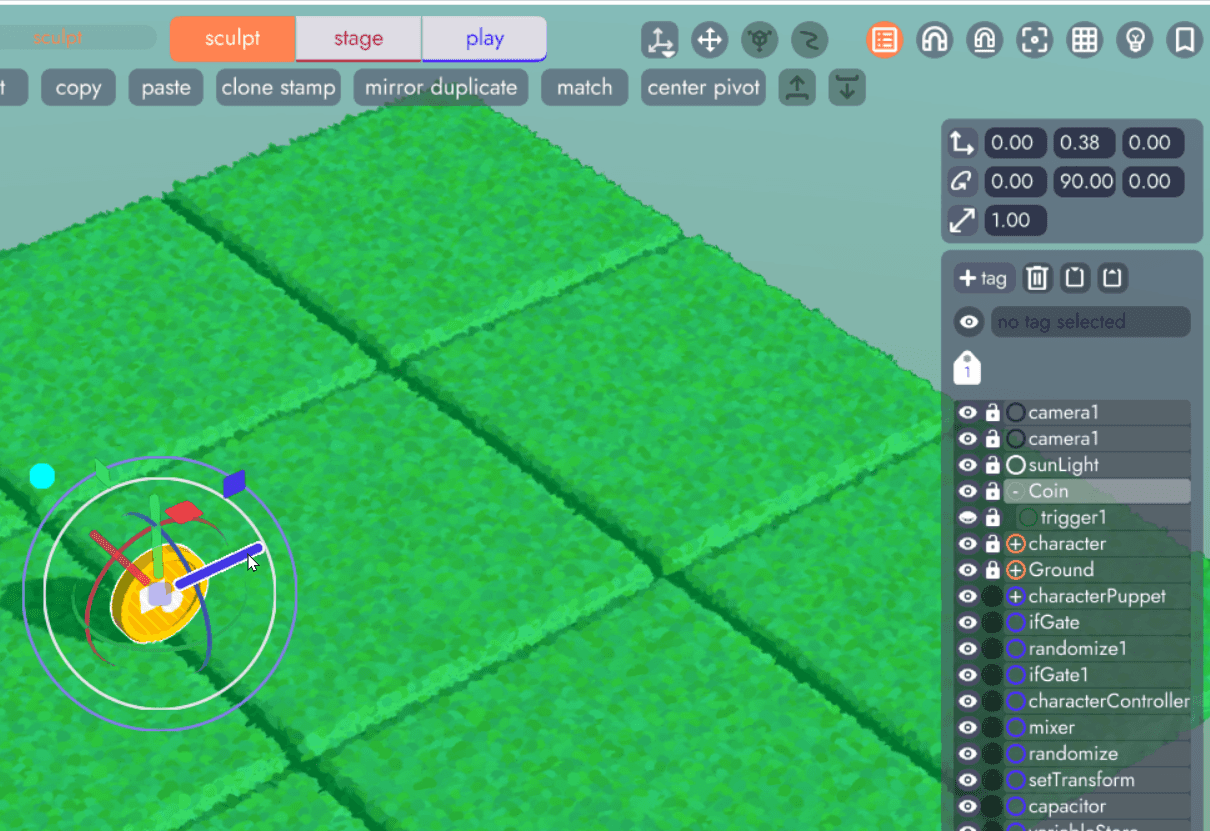
Here you can see the coin being dragged to around 7.5 in the positive x direction. Repeat in each direction to determine our min and max values for the X and Z axis. For this example the ranges came out to:
- X from -7.5 to +7.5
- Z from -5.5 to 5.5
Need to re-center your coin?
If you want to return your coin to the center of the project, simply click the position reset button with the coin still selected.
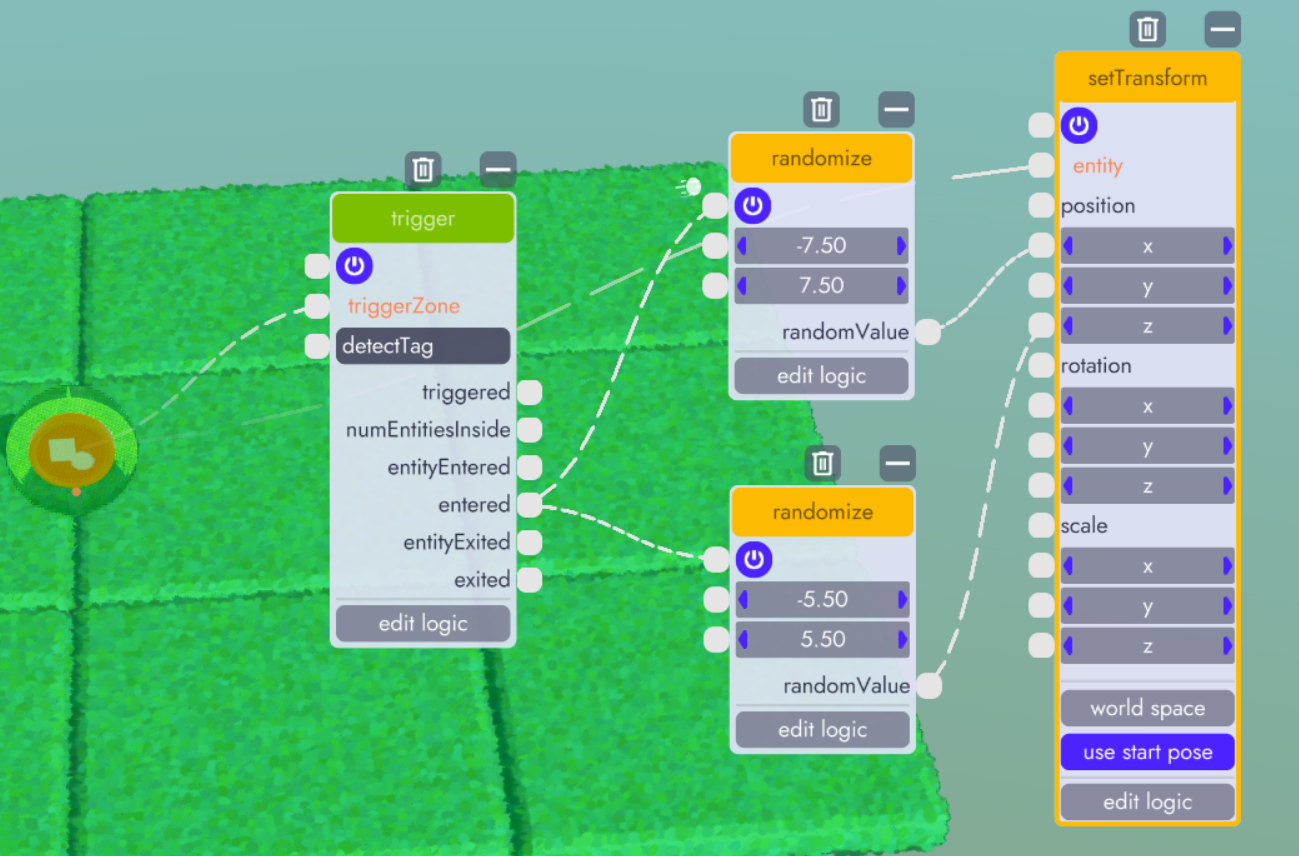
Now that we have the values, let's add 2 randomize logic blocks to our scene. These will go between the trigger and the setTransform (remember to clear the X and Z values on the setTransform block from our previous test).
Enter min and max values for X in the first randomize block and min and max values for Z in the second. Now connect entered from the trigger to the round, purple power button of each of these nodes and the randomValue outputs to the X and Z position inputs on setTransform.
When the player trips the trigger, it will cause the randomize nodes to run for one frame and generate random numbers (within the defined range), each of which feeds into setTransform, changing the coin's position!
The final graph will look something like this:
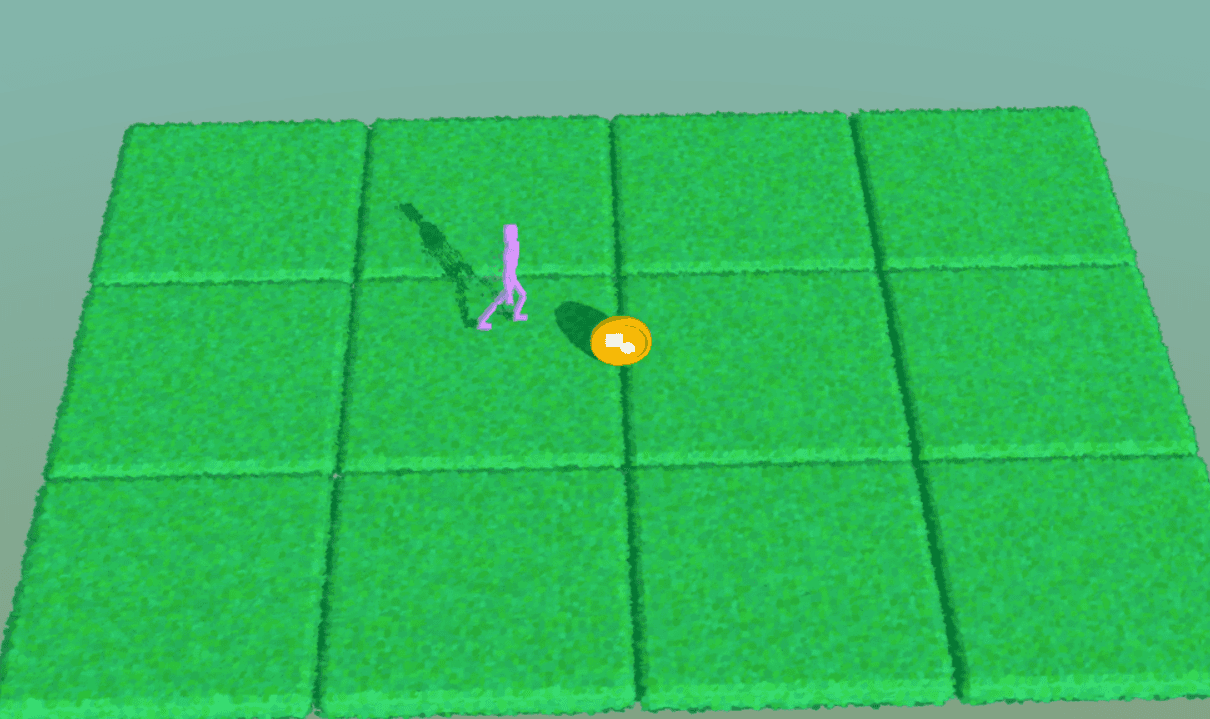
Now, when the player walks onto the coin (tripping the trigger) the coin will warp to a new random location within our game world.
Not exactly the next Undertale... yet  In the next article, Adding Juice, we'll give the coin a little more personality.