Setting Up World Boundaries
Overview
In a previous article (Collecting Items) needed to know where our game world ends so that when selecting random positions for the coin it never placed the coin "out of bounds". We dragged the coin around the world to find our min/max values and then entered those into the randomize logic blocks.
This worked just fine for that example. But what if the size of our game world changed during development or even as part of gameplay? What if other objects in our game also needed access to the same information?
Every time that information changed we'd need to update that in multiple places, which is both tedious and prone to human error. This is where variables can help.
Logic Blocks Covered in This Example
- variableStore
- variableLoad
- setVisibility
Related Information
If you're unfamiliar with visual scripting, consider reading Unbound's Logic Block Basics before continuing.
If you'd like to follow along or see the finished product you can download the file here.
The Setup
In this article we're going to create boundary markers that we can see and adjust in our scene. We're going to capture information from those models and store them in variables that any object in your game can access.
This will save us time and cut back on human error. It also means that if our game size changes, we can simply adjust our boundaries by dragging them to the new edges of our world and every object in the game will receive the updated values!
Modeling the Boundary Markers
Let's start by switching over to the Sculpt Tab to model a very simple pillar. It doesn't matter what they look like, they won't be visible in your game. They should be easy to see. Tall and skinny is preferable because it needs to be easy to tell where the center of the Y axis (up/down) is at a glance.
Once you're happy with the model, make 3 copies and position each of them at the edge of your game world. With your model selected, you can use CTRL/CMD + D to quickly make copies. Here's an example, but you can make them look however you'd like.
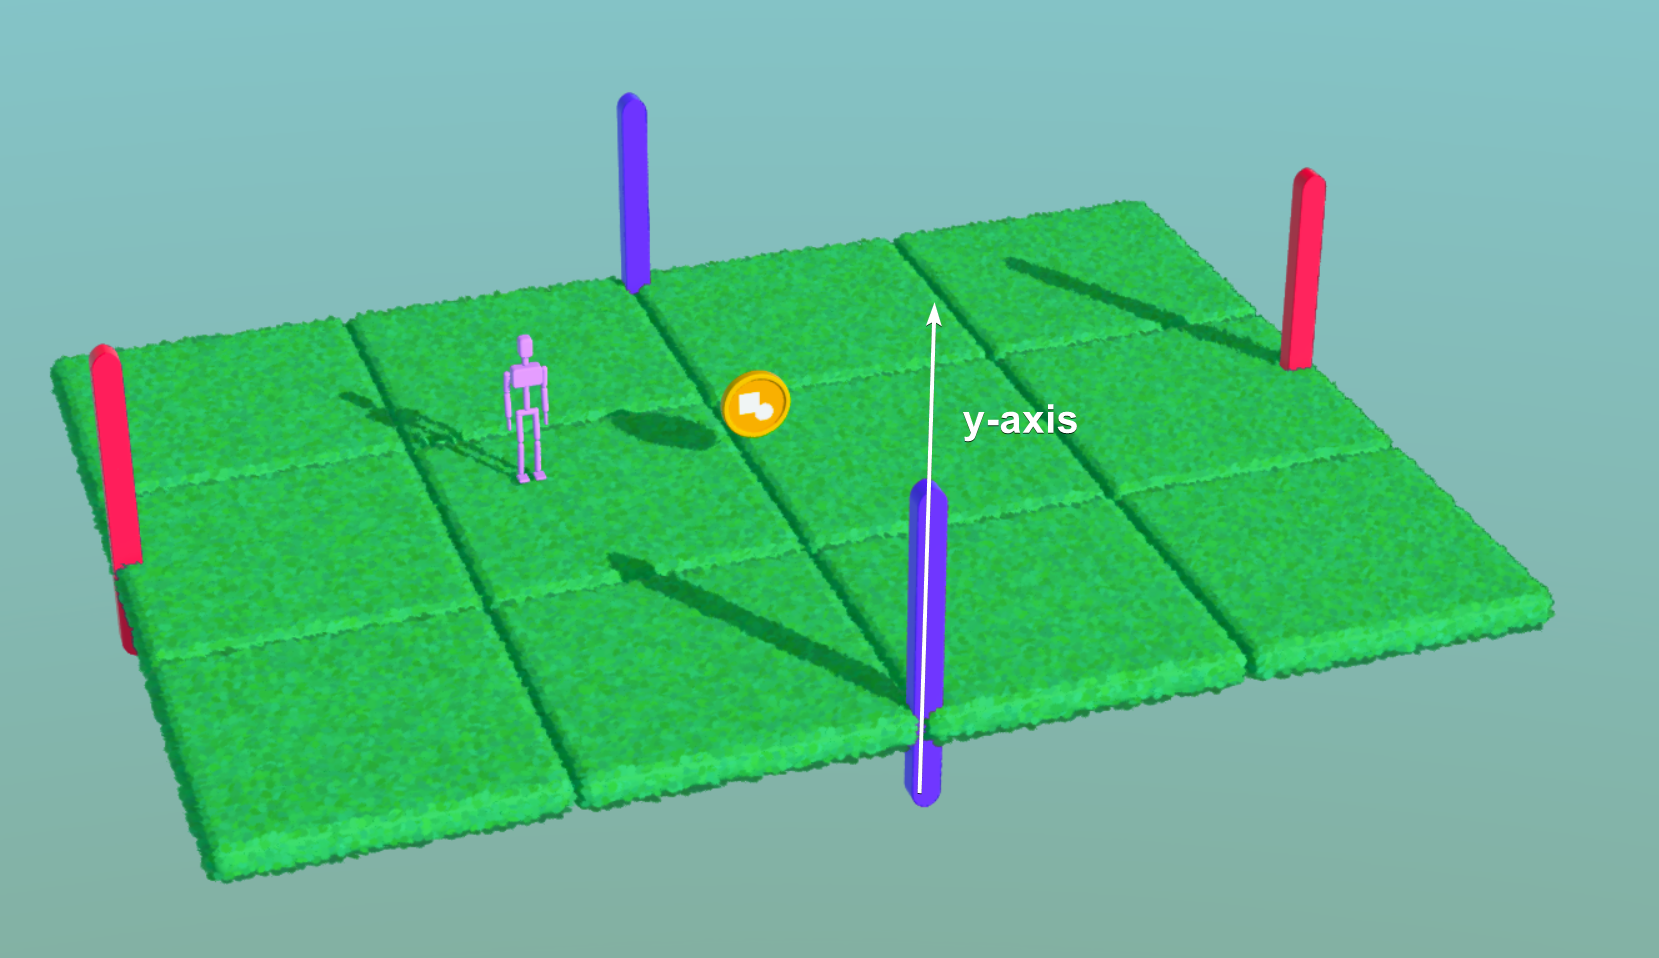
I've colored two of them red to match the X-xis and two of them blue to match the Z-axis. You don't have to do this if you don't want to.
Tip
If you're not familiar with how to model in unbound, check out the article on models.
Storing a Variable
Two of these boundary markers (the red ones on the left and right of the screenshot) represent the min/max X values of our world. The other two (the blue ones at top and bottom) represent the min/max Z values.
What is a variable?
A variable is a container for a value. It's called a "variable" because it can change.
Let's focus on just the X-min value. The process will be the same for all 4 of these. Locate the boundary marker that's the lower of the two values. For me that's the leftmost red marker. Depending on your camera's orientation, yours may not be on the left.
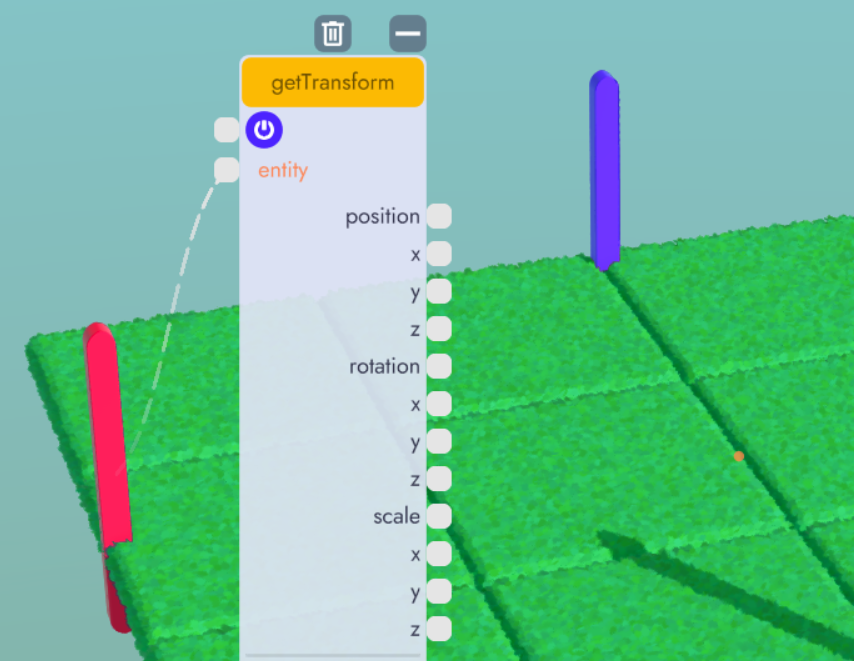
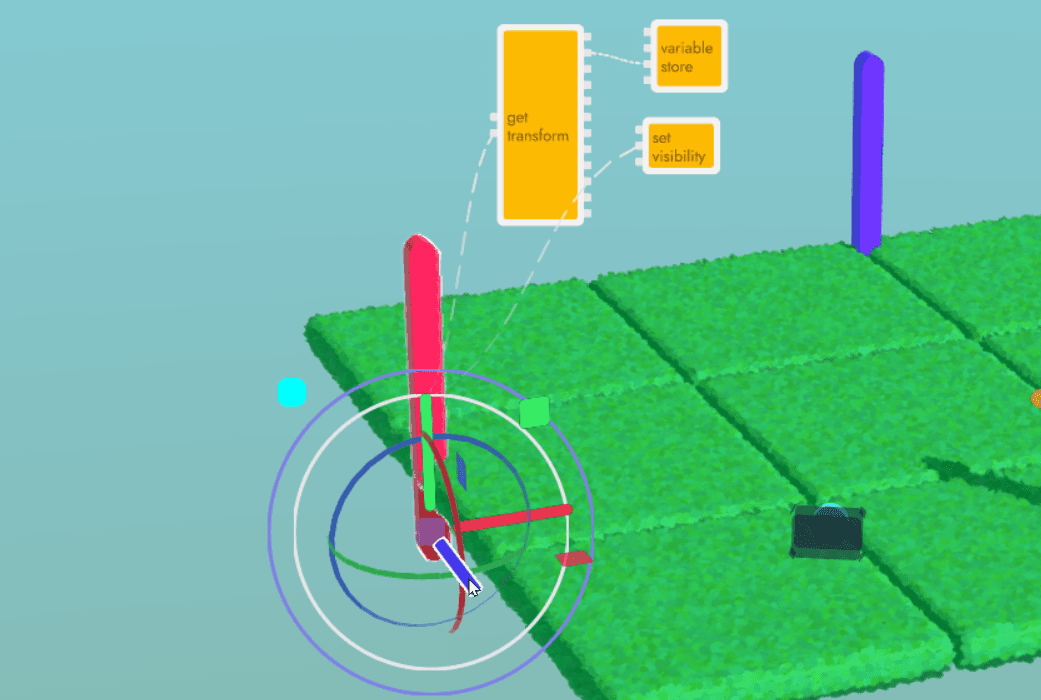
Let's return to the Play Tab and connect a getTransform logic block to that pillar, like so:
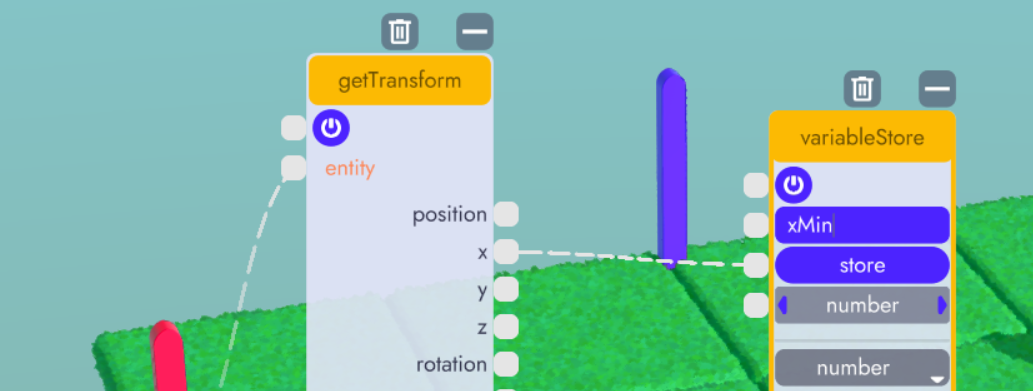
Then let's bring in a variableStore block and connect the X-Position output from getTransform to the store input of varableStore. While store is on (this is the default state) it will save the X Position on every frame - this is what we want.
Tip
Since we're storing a number, we don't need to change the variable type but you should be aware that you can save different types of variables by changing the first dropdown in variableStore
Lastly, in order to be able to retrieve this variable elsewhere, we have to give it a name. Enter "xMin" in the name field of the variableStore logic block.
The final setup should look something like this:
What we have here is a visual way to define the boundaries of our game world. Of course, this does us no good if we can't retrieve and use this variable somewhere else.
Let's address that now.
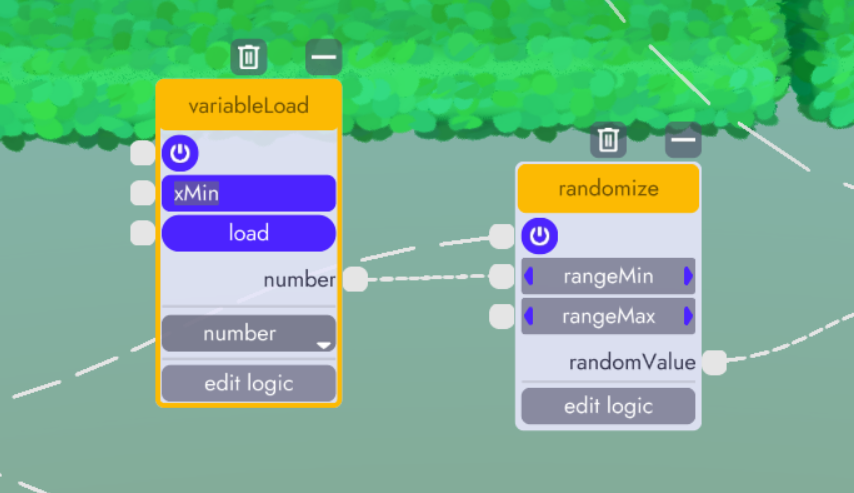
Loading a Variable
You may recall, from the Collecting Items article, we were using the randomize logic block to choose acceptable X/Z coordinates to move the coin to. We set those values manually by typing them into the rangeMin and rangeMax fields.
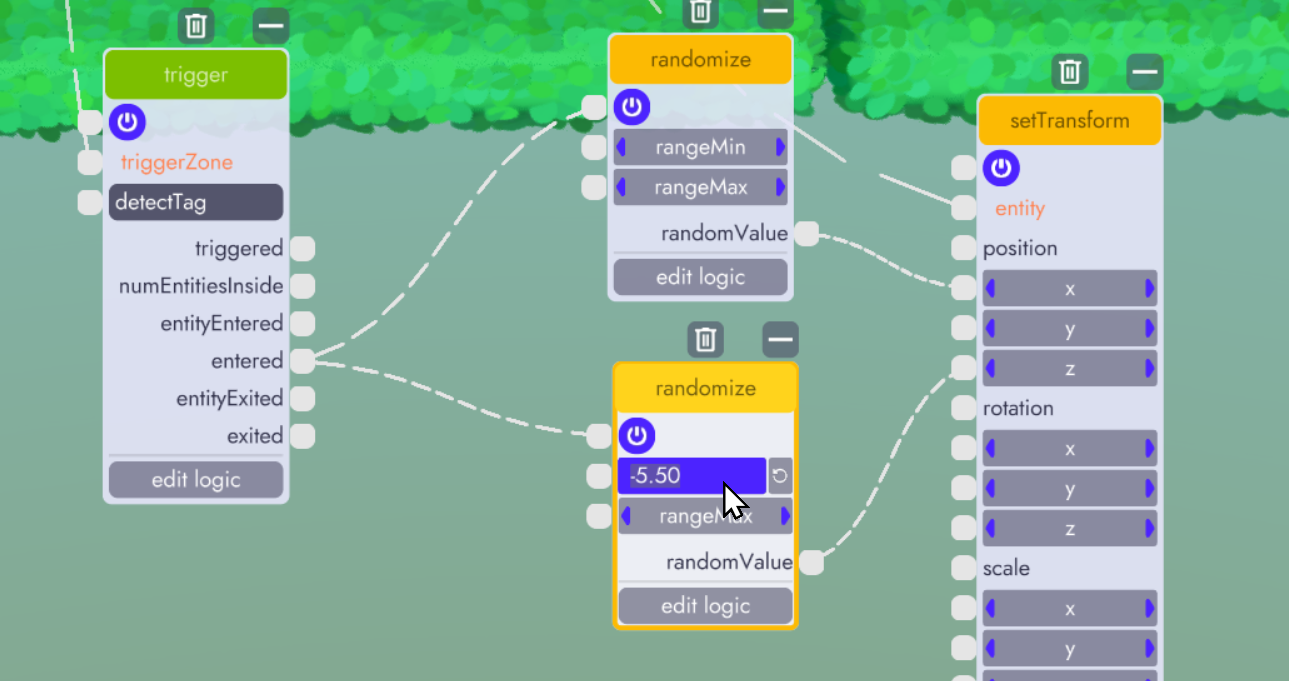
Now that these values are originating from an object in our game world (the boundary markers we made) we no longer need to enter values in these fields.
Drag a variableLoad logic block into the scene then connect it to the rangeMin field for the randomize block responsible for picking a new X position. Lastly, enter "xMin" in the name field so that loadVariable knows what variable we want to retrieve.
It should look something like this when you're done:
Housekeeping
Before we finish working on the minimum X boundary marker, let's do a couple more things.
Rename the Boundary Markers
First, let's rename this boundary marker to "xMinBoundary" in the organizer. Double click the default name in the organizer to edit the name.
Not sure which model is which in the organizer?
With your organizer open, hover your mouse over the model you're looking for. It will become highlighted in the organizer.

It's easy for the organizer to get cluttered, so stopping occasionally to rename models is a good idea.
Hide the Markers
Of course, these markers are only meant to be seen in the editor. We don't want them showing up in the game. So let's add one last logic block called setVisibility. As we've done before, connect the entity input to the boundary marker and toggle the visibility property off (it should be gre=ay).
Now when the game runs, setVisibility will hide these markers so they don't show in the game.
Make the Logic Blocks Children
Next, find the getTransform, variableStore, and setVisibility logic blocks in the organizer (the same tip above will work) and drag them onto their boundary marker's model. By making the logic block children of the boundary marker, they will follow the logic block when you move it around. They will also be hidden when you hide the logic block.
Minimize them and move them close to their parent logic block. This gets them out of the way and makes them easy to find if you need them.
Final Thoughts
If you repeat this process for the 3 other boundary markers you'll have a clean and easy to use way to control the boundaries of your world. Perhaps you're making a Snake clone and you need to know the boundaries both for spawning food and wrapping the snake at the edge of the world.
Building clean and easy to use tools like this is a fundamental building block when making larger projects with visual scripting (logic blocks).
Pro Tip
If you took one boundary marker all the way through this tutorial, you could then duplicate that model, along with its nested logic block, to more quickly create 3 nearly complete instances of this boundary marker. Just don't forget to change the variable and values you're saving for each after you copy them.