Logic Blocks
As briefly covered in the overview article, logic blocks allow you to add interactivity without having to write code. In this article we're going to cover the basic interface for adding and working with logic blocks.
Note
For more detailed looks at individual logic blocks, check out the Logic Block Examples; starting with the article Clicking on a Model.
Adding Logic Blocks
Logic blocks can only be added when in the Play Tab. From there, click the logic tool to open the Logic Library. This library includes all the blocks that ship with unbound as well as blocks you've written and/or added to your own library.
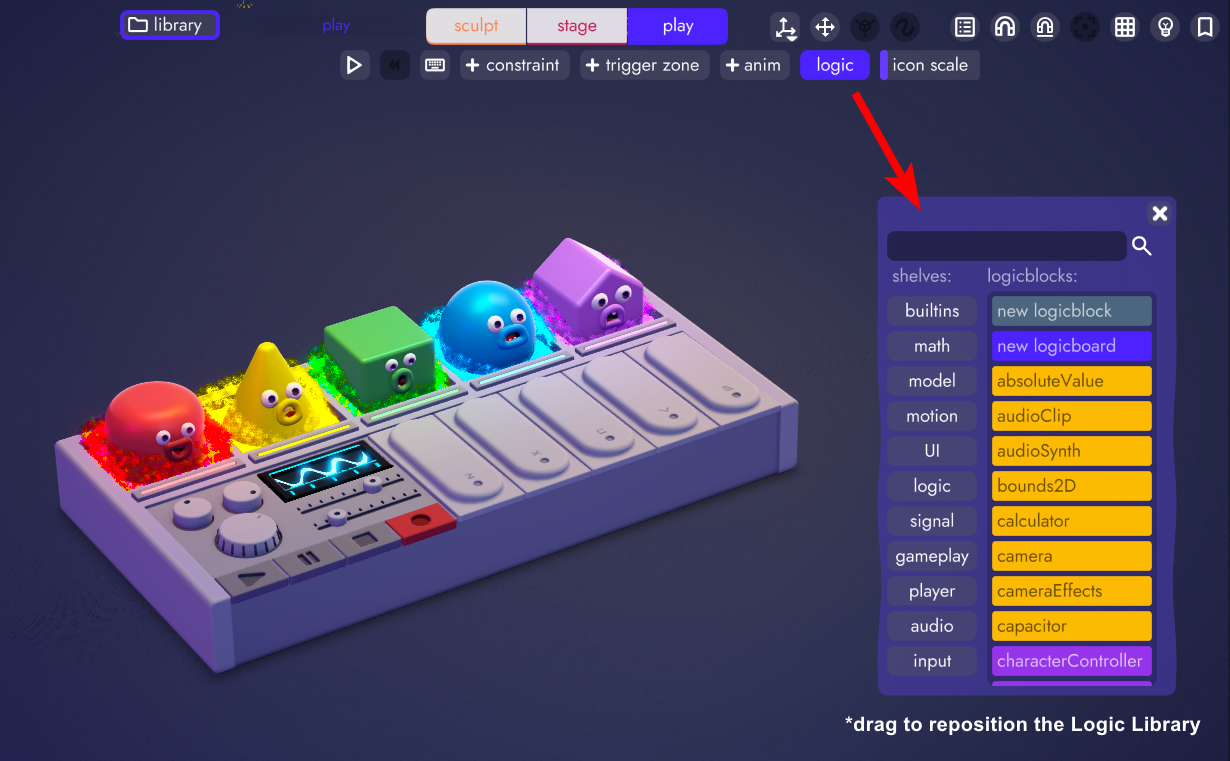
This scrollable list of blocks can be filtered by entering search terms in the field at the top or by clicking the filters on the left to narrow the list.

Once you've found the block you're looking for, click and drag it into the scene.
Logic Block Anatomy
Every logic block has some combination of the following attributes.
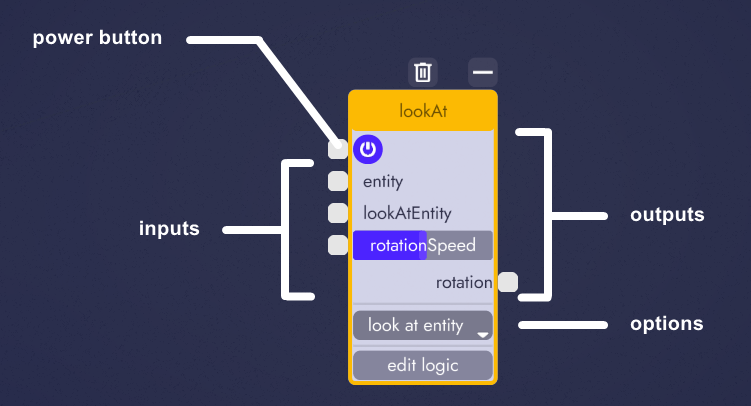
Power Button
 When this button is purple the block is said to be "on" or "enabled" meaning it will execute its logic as part of the scene's logic graph. When toggle off (grayed out) it will not. The state of the power button can be controlled by other logic blocks by connecting to its input (the dot to the left of the button).
Inputs
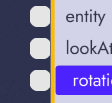 Inputs connect to other logic blocks or entities, so long as their types agree. For example, the "entity" input above expect a connection to any object that qualifies as an entity, such as a model, a camera, or a light.
Don't worry, unbound won't let you connect any two objects that don't agree. More on that below.
Outputs
As a logic block executes its logic it will sometimes make accessible internal data so that it can be fed into other logic blocks. These are known as Outputs For example, here's an oscillator feeding values to a setTransform block, resulting in the model moving up and down.
Note
The above examples is taken from the logic block example article: Adding Juice. That article will walk you through setting up this effect, along with sample assets for you to follow along.
Options
Some logic blocks have settings and toggles for changing the behavior of the entire logic block. A good example is the characterPuppet block which has options for switching between different poses.
Creating Connections
To connect logic blocks to each other or to other entities, click and drag from the input or output to the desired connection. Valid connections will show as white while invalid connections will show as red. You will also notice that invalid i/o will be grayed out as soon as you begin dragging a connection.
Clearing Connections
To clear a connection click on a connection dot at either end and the line will be cleared.
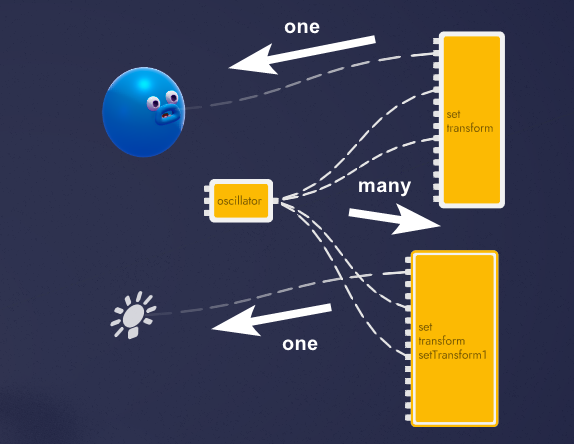
Multiple Connections
An output may connect to any number of valid inputs however an input can only accept one connection. If you intend to feed more than one connecting into an input, have a look at ifGate, ifValueFilter and selector logic blocks.
Positioning Logic Blocks
Logic blocks can be shift selected so they can be moved as a group.
Because logic blocks are represented in the organizer, they can also be nested inside models so that when the model moves the logic blocks come along with it.
Tip
Logic blocks can be copied and pasted or duplicated just like any other object in unbound. You won't always need to open the Logic Library to add new functionality and if you have groups of logic that you want to reuse - select them all, copy, and paste!
The above gif comes from a logic block example entitled Setting Up World Boundaries
Resizing Blocks
Every tab in unbound offers an icon size slider which controls the in-editor size of things like lights and joints but also collapsed logic blocks. When you're working in the play tab but want collapsed blocks out of the way, you can adjust the icon size to buy yourself more space.
Changing the icon size is not the only way to organize and clean up your logic. In the next article we're going to cover Logic Boards, which allow you to group logic blocks into collapsible windows with their own i/o.