Overview
What are Constraints?
Constraints allow you to form relationships between physics objects to create more complex simulations like chains, rag-dolls, and other systems that need to be joined or limited in some way. They can form rigid bonds or behave more like springs, depending on how you set their properties up.
Constraints UI
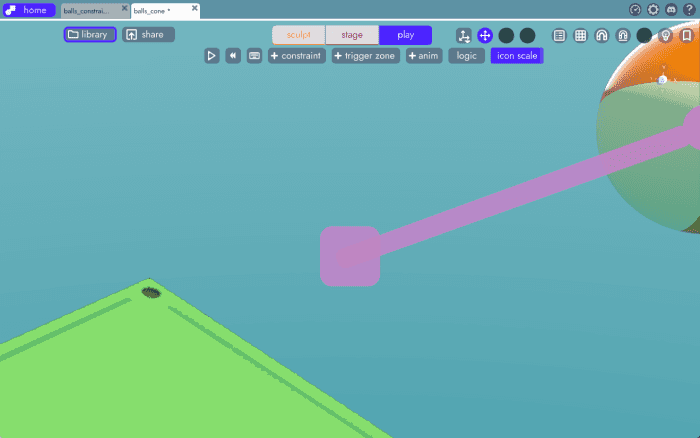
Though they all look a bit different, each constraint is represented by a purple/pink line in the editor. Some will also have additional visual cues representing the values of that constraint's properties. The image below shows a Distance Constraint connecting two balls. Also visible are additional measurement lines showing the min/max limits set on this constraint, which is covered in more detail in the article on distance constraints.
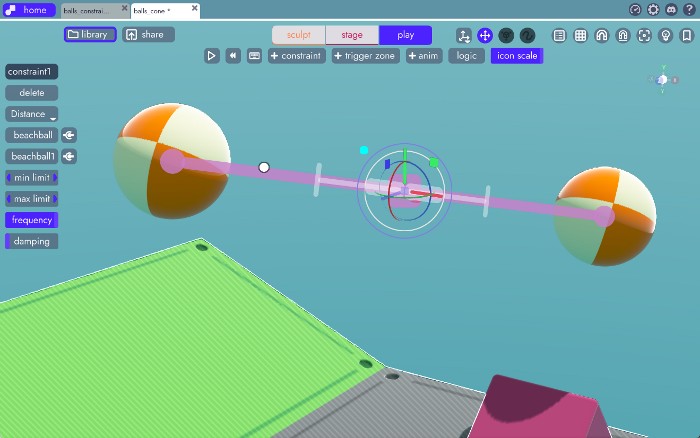
These lines will only be visible from the Play Mode or while testing the game with input disabled. They will not appear in your final game/project.
Adding Constraints
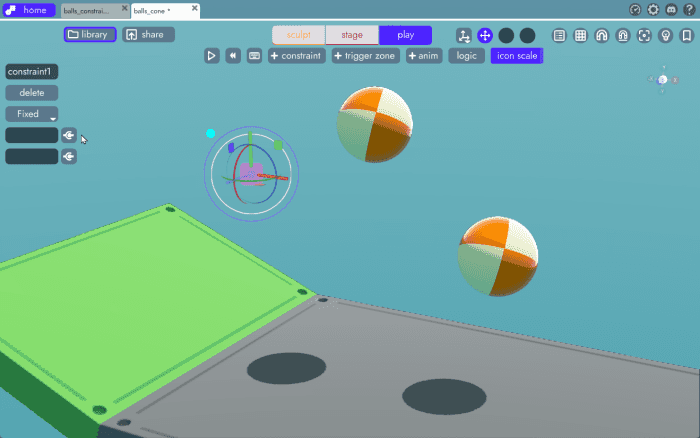
Constraints are added from Play Mode...
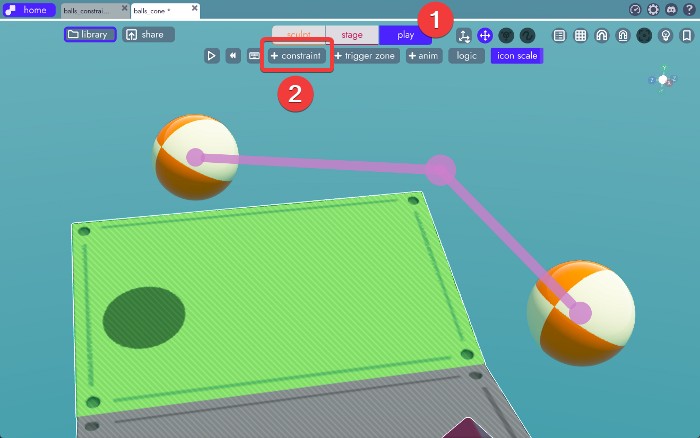
To add one to your scene, click the [+ constraint] button then click anywhere in your scene. The purple/pink square that appears represents the constraint.
Don't See the Square?
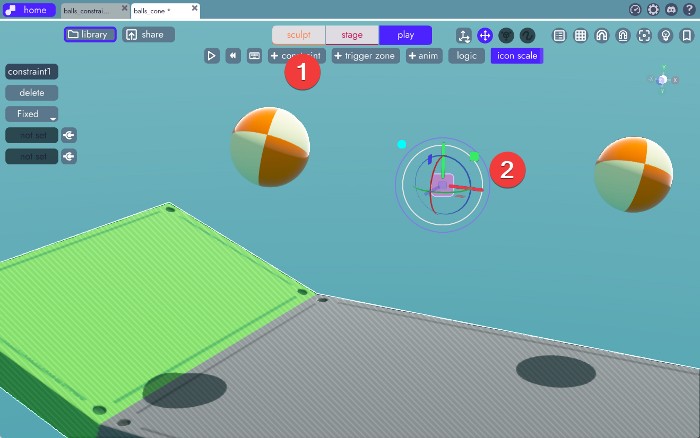
If you do not see the constraint or if the box is too small to see or select, you can make them larger by adjusting the icon scale.
![]()
Constraints, like all other objects in unbound:
- can be selected and repositioned using the 3D-gizmo
- can be renamed
- appear in the Organizer and can be nested under other objects
Choosing a Type
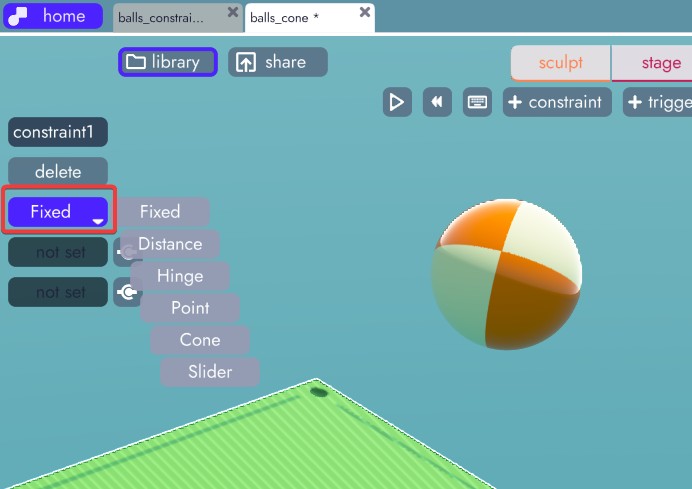
With your constraint selected, click the Constraint Type dropdown. By default, it is set to Fixed.
There are 6 types of constraints in unbound, each with a specific set of behaviors and properties. They're covered in detail in each of the next 6 articles.
- Fixed: weld two objects together
- Distance: connect two objects by a fixed distance
- Hinge: connect two objects at fixed distances with a hinge in the middle
- Point: connect physics object to a single point (useful for making chains)
- Cone: constraint with a conical limitation on motion
- Slider: fix physics objects to a track
Connecting Physics Objects
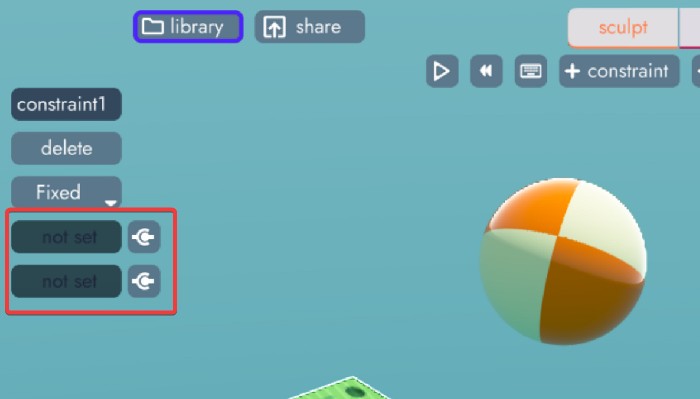
Although each constraint behaves a little differently, they all use the same connection interface. The image below shows a Fixed joint that has not had any physics bodies connected to it yet.
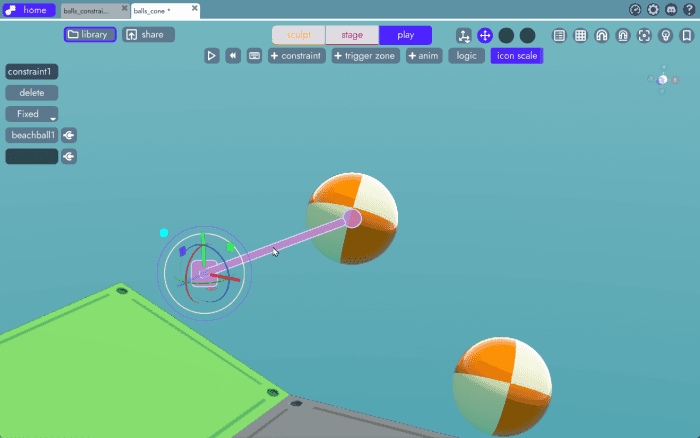
To connect a physics object to a constraint, click the square icon that looks like a ball and socket joint then click the object you wish to connect.
Tip
The unbound UI will snap to valid objects and reject invalid objects. For example, a constraint cannot be connected to another constraint - only physics objects.
Once connected, the name of selected object will appear in the field next to the connection icon. Besides validating the object you've selected, clicking this field will select that physics body. 
Tip
If the selected object isn't framed properly, press F on your keyboard to bring it to center frame (as demonstrated above)
Disconnecting Physics Objects
If you need to disconnect a physics object from a constraint, simply click the connection button next to the object you want to remove and then click somewhere in the project that is not a physics object, like in the background of your scene. This will remove the connection.
Alternatively, you can connect directly to a different physics object if you need to swap objects rather than clear the connection.
What's Next?
Adding, connecting, and disconnecting objects to constraints follow the same process no matter which constraint you're working with. The properties they expose and the way they behave, however, does differ from constraint to constraint. To begin learning more about physics constraints in unbound, start by reading the article on Fixed Constraints