Triggers
Triggers are invisible zones in your game world that detect when something enters, stays inside, or exits them—but don’t physically block or react with objects like solid geometry does.
Triggers are commonly used in games for things such as:
- opening a door when a player gets close
- spawning or initializing objects when the player reaches a certain point in a level
- counting or deleting objects when they fall into a region (like when a ball falls into a cup)
Example
In this example, we're going to construct a very simple scene that detects when a specific object enters a trigger and then trigger an animation as a result. We're going to start with a bowling ball that roll down a ramp and stops when it collides with a barricade.
Adding a Trigger
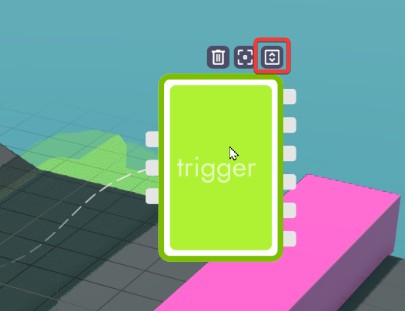
From the Play Tab click the [+ trigger zone] button and then click at the location you'd like to add the trigger. Don't worry about the shape and exact placement. We'll be making adjustments to both in the next step.
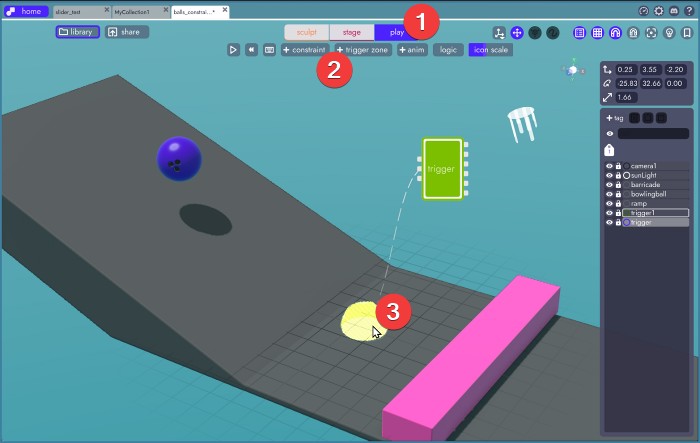
Note
Triggers are a special object type in unbound in that they will always come with a supporting logic block. You can see this in the image above as the floating green rectangle, which we'll expand upon shortly.
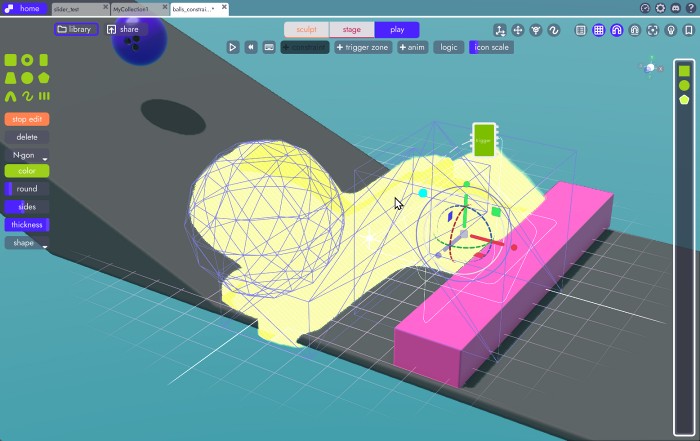
Editing the Collider
The collider, which by default is a hazy yellow object, defines the collision region of the trigger. It is against this volume that the trigger will report when an object has entered, exited, or exists within itself. To change the size and shape of this collider, select the default trigger's model and then click [edit collider].
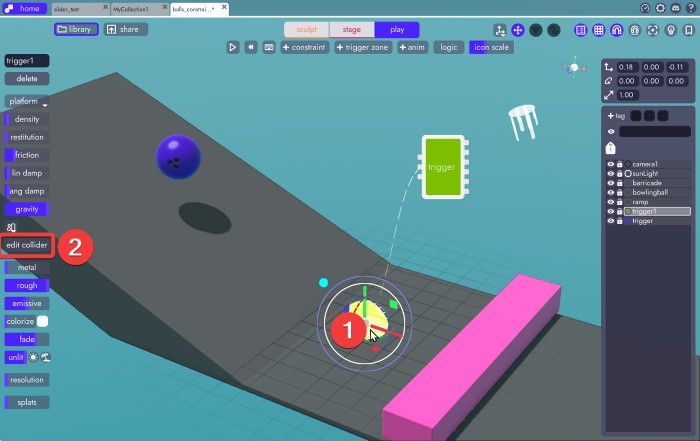
This will take you to a screen within Play Mode with controls familiar to that of standard sculpting.
- Add and set properties of edits
- Select and transform edits
- Reorder edit list
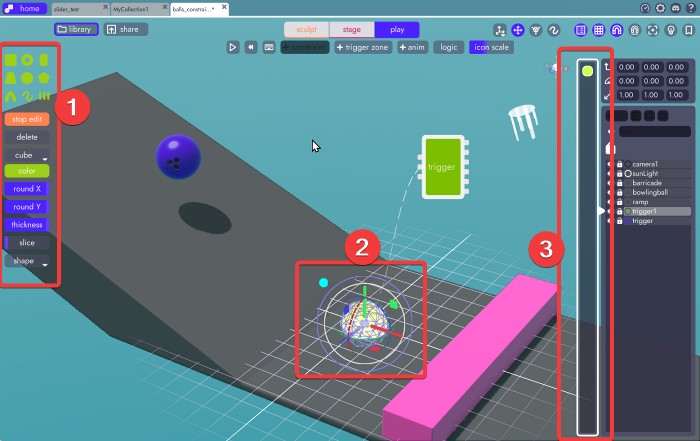
Note
You may notice that some finer controls, like painting and subtracting, are not available in this modified interface for sculpting. Triggers tend to be rough and imprecise and thus require only a subset of the full sculpting interface in order to serve their purpose.
Now, in order to make the trigger large enough so that the ball is guaranteed to pass through it, we're going to change the sphere into a cube and expand it to fit the width of our ramp.
Tip
You can convert any edit into a different primitive by selecting the edit and then right-clicking on the new primitive shape. You can see this action being performed in the example above. A model or trigger must have at least one edit, so you cannot simply delete the sphere and then add a cube. You can, however, add a cube and then delete the sphere - but the above trick saves quite a few actions 
If you need a more complex shape as a trigger, you can add many edits of different primitive types and blend them together just as you would when sculpting. That's not necessary for this example, but here's what that might look like.
Detecting the Ball
In order to detect when the ball enters the trigger, we need to do at least 2 things:
- Tell the trigger which tags it should respond to
- Apply the tag to relevant object, in this case the bowling ball
Set Detect Tag
Start by hovering over the trigger (green rectangle) then clicking the expand icon in the upper right. This will let us see the logic block so we can make the necessary changes.
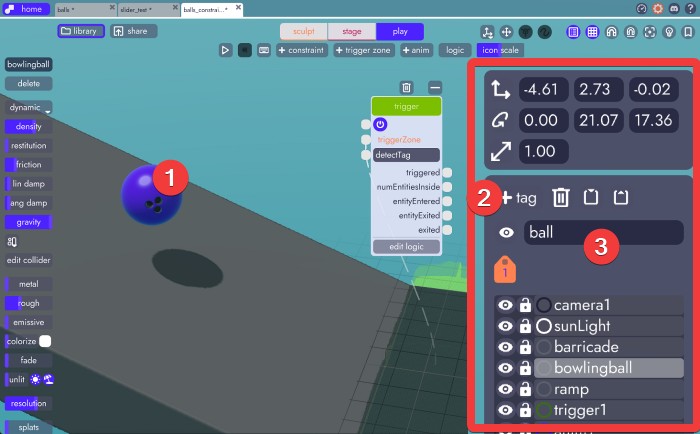
In the window that opens, click on the field that says "detectTag" and then enter the word "ball"

This tells the trigger to only respond to physics object with that tag.
Tag the Ball
Next, click on the bowling ball and then from the organizer add the tag "ball" to that model.
Note
If you do not see the list on the right, the organizer, you may need to toggle it on by clicking the organizer icon in the upper right.

React!
You can trigger any number of things. In this example, we're simply going to trigger an animation that lifts the barricade up so that the ball does not collide with it. Since animations are well documented in this article, we're going to skip to the step of wiring the trigger to the animation.
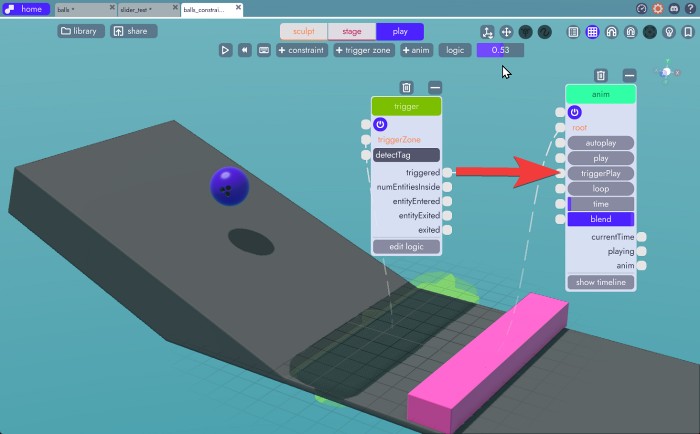
Now all we have to do is connect the triggered output for the trigger to the triggerPlay input of the animation and when it detects an object with the tag "ball" it will play the animation.
Trigger Outputs
In this example, we're only using the triggered output but a trigger will give you more events/data to work with than just that. Here's a breakdown.
Each of the following will only trigger if the object in question has a matching detectTag on it.
- triggered - returns true when an object enters the trigger
- numEntitiesInside - returns the number of objects inside the trigger
- entityEntered - returns the entity that entered the trigger
- entityExited - returns the entity that exited the trigger
- exited - returns true when an object exits the trigger