Working with Edits
As we learned in the Edits article, edits give shape to the model and influence each other based on their mode, color, and order within the edit list. We're going to take a closer look at some of those things in this article.
Adding Edits
To add a new edit, click on one of the primitives in the upper left and drag it into your scene. If you're not already editing the selected model, dragging a new edit in will automatically switch you to edit mode.
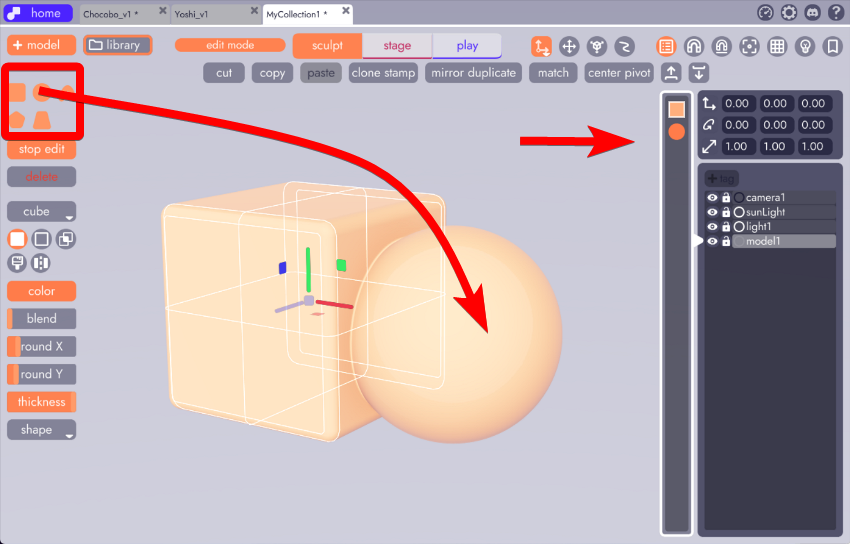
You'll notice that this edit now appears in the edit list on the right.
Changing Primitives
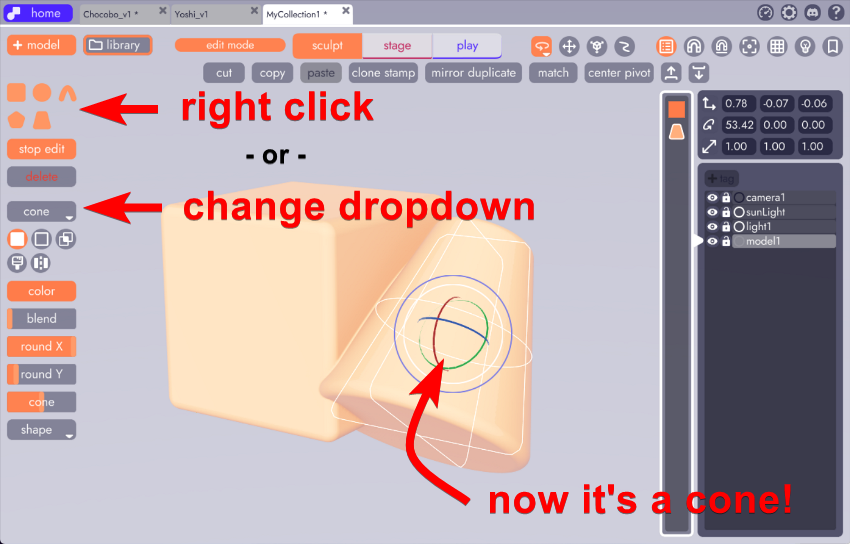
Because everything in unbound in non-destructive, you can change an edit's base-primitive at any time. Do this by selecting the edit and then changing the type in the dropdown or by simply right-clicking on one of the shapes in the primitive selector.
Modifying Types
As of this writing, there are 5 types of influence an edit can exert on another edit (or in the case of mirror... itself) Let's go through each one.
Note
Keep in mind that edits exert their effect only on edits ABOVE them in the organizer. You may need to reorder your edits to achieve certain effects. This is discussed more below.
Additive
 The most basic and default type is additive. This makes the edit a solid, visible shape that adds volume to the model. Both the edits in the above examples are additive.
Subtractive
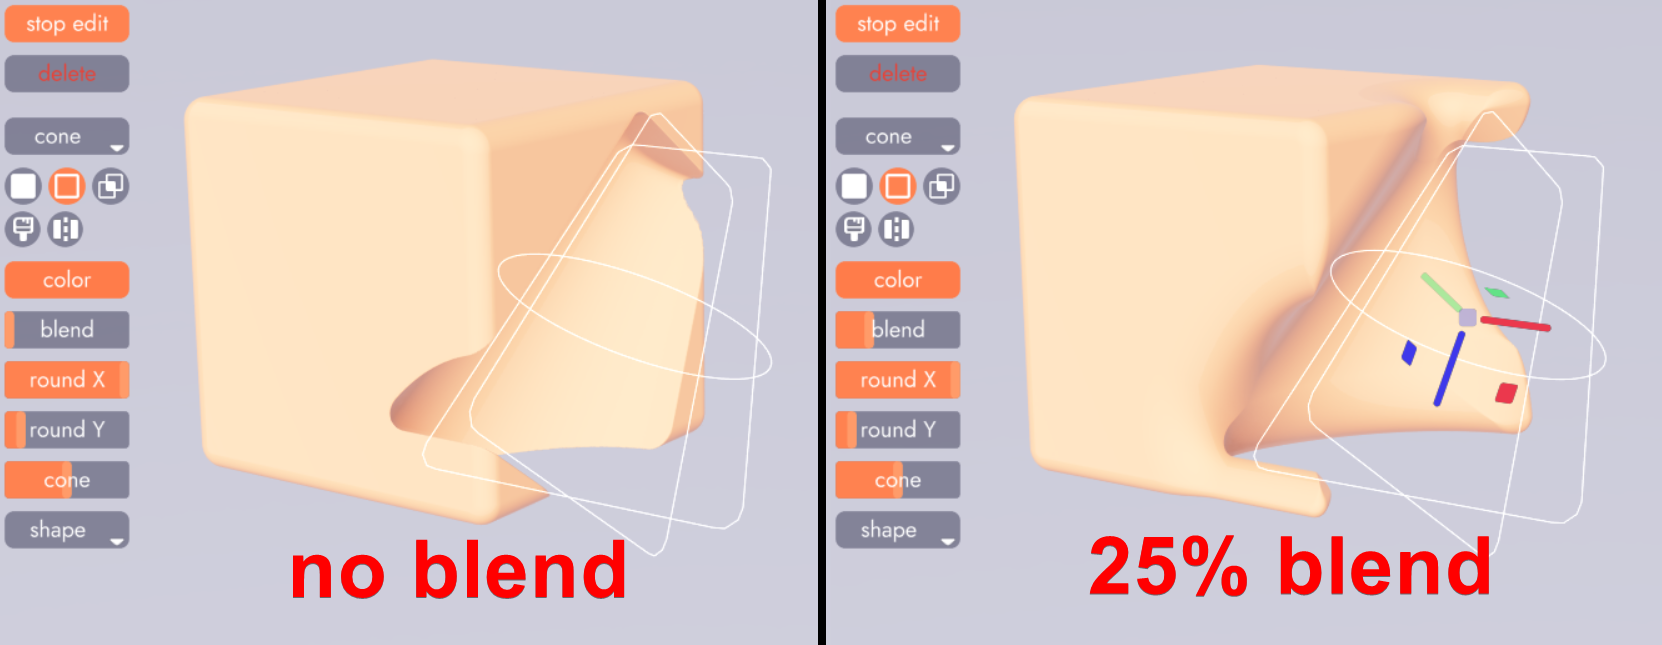
 Subtractive edits do not display in your scene. Instead they carve their shape from other edits in their model. When selected they will show as a wireframe. Adjusting the blend property will determine how sharply or softly a subtractive edit removes volume from another edit.
Crop
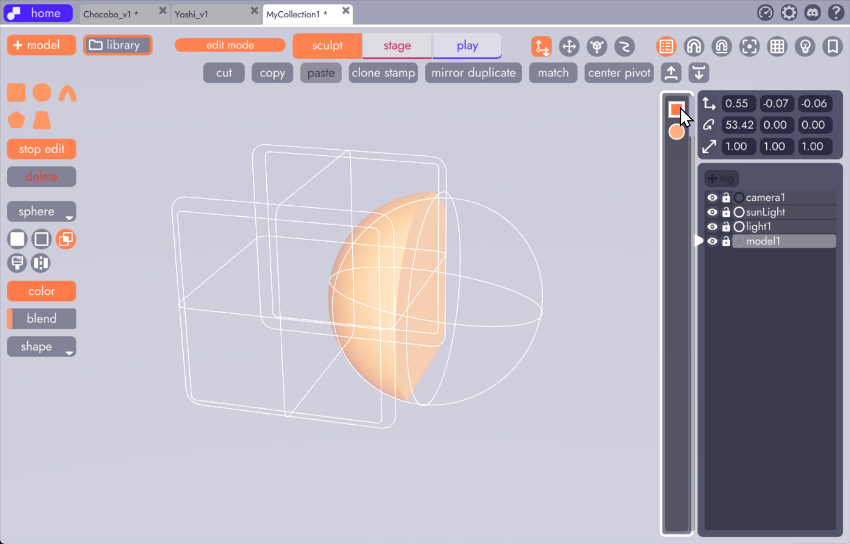
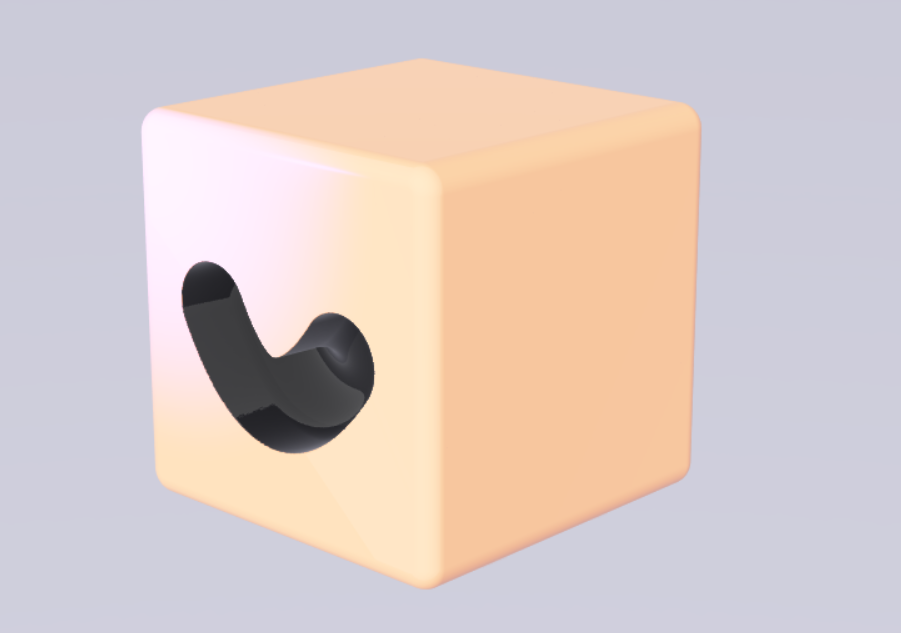
 Crop is similar to subtractive mode but instead of carving out from affected edits you'll instead get the intersection of the edits. Here you can see a cube being influenced by a sphere set to crop, which leaves only the portion of the sphere that overlaps the cube.
For more information on crop mode, check out the 1 minute quick tip.
Paint
 Paint will not show itself in the scene. Instead, it will apply its own color onto models within its range of influence.
In this example you can see how the edit disappears when it switches to paint mode. The color, once changed, shows as a hard intersection with the cube until the blend is turned up, softening its influence on the cube.
Every edit, whether in paint mode or not, can have its own color. Subtractive edits paint the inner cavity of the model they carved into 
Mirror
 This mode will duplicate itself along the y-axis. When using this, you'll need be aware of an edit's position relative to the model's origin.
This is handy for sculpting symmetry, faces, windows on either side of a door, a repeating ornamental frame. In this example, you can see a harness that was modeled using the mirror modifier. As one half moves away from the y-axis so does its counterpart.
Modifying the Pivot Point
Sometimes it’s necessary to change the origin, or pivot point, of a model. There are two ways to do this.
Using the Center Pivot Button
From the Sculpt Tab, with your model selected, click the center pivot button. This will recenter the model’s origin at the center point of the selected edit, or the average center point of multiple selected models.
Tip
Bear in mind that mirror edits may be affected because they are mirrored around the center point. So if you choose this option, be mindful that you may need to adjust those edits after the move.
Manually Moving Edits
You can also select all the edits inside your model and reposition them as a group. This option can be preferable if you just want to adjust the pivot but don’t want it in the center. For example, if your model is of an arm you likely want the pivot at the shoulder and not the forearm.
Tip
It’s worth noting that as edits get farther from their local origin (0,0,0) their resolution decreases. This, along with other factors such as the point around which an object rotates, may affect where you place a pivot and which edits should be grouped into the same or separate models.
It’s common to only need to reposition along one or two axes when adjusting the pivot point. In these cases it’s a good idea to use the plane handle (colored square on the plane you wish to move your edits). This, for clarity, might allow you to ensure you only move your edits along the X and Z axes (along the “ground”) without affecting the Y axis. It may also be helpful to toggle on your world aligned gizmo, which you can read more about here.
Tip
You can put your model inside of a joint and use that as a pivot point that can be positioned without effecting mirroring or resolution.